EPOS Backoffice
Use the Backoffice to create, update, review, and publish metadata in an EPOS Platform instance without editing TTL files by hand. This guide focuses on the day-to-day editing process for editors and other content managers. For lifecycle diagrams, roles, and the full permission model, see the Backoffice Service reference.
What the Backoffice helps you manage
The Backoffice is the metadata management interface for an EPOS Platform instance. It follows the EPOS-DCAT-AP model used by the catalogue and exposes the main entity types directly in the UI:
- Data Products
- Distribution
- Software Applications
- Software Source Codes
If you want more background on the underlying metadata model, see:
- Describing Your Data for the manual TTL approach
- EPOS-DCAT-AP for the metadata model specification
- Data Model for entity relationships in the system
- Glossary for short definitions of EPOS terms
Before you begin
- The Backoffice is usually available at
/backoffice/homeon your deployed EPOS Platform instance. - Your first login creates your Backoffice user, but it does not automatically give you permission to edit metadata.
- You need both a role and membership in the relevant group before you can edit or review records.
- If you still need a local or test deployment, start from the Quickstart.
Get access and finish your first login
After your first login, the Backoffice may show only the Groups area. That is expected: it means your account exists, but you do not have edit permissions yet.
- Log in with your email.
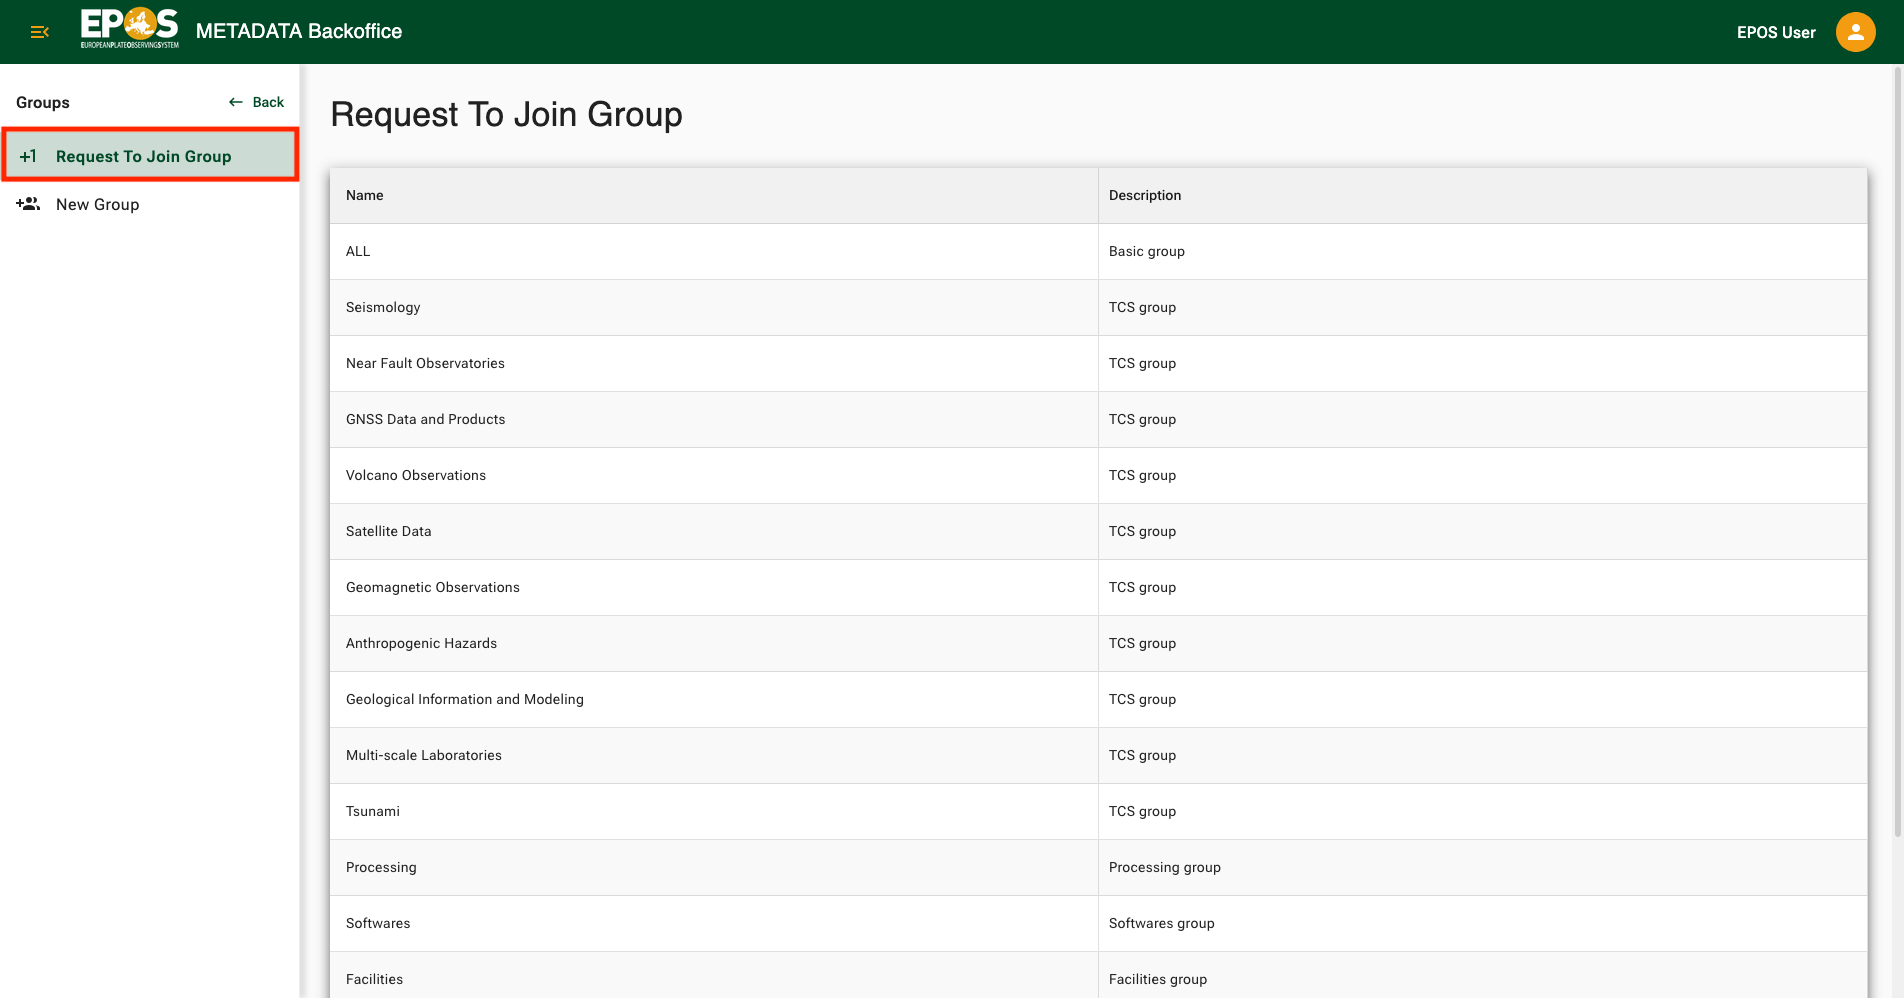
- Open Groups.
- Click Request To Join Group.
- Choose the group that owns the metadata you need to work on.
- Wait for approval from a group admin or Backoffice admin.
Depending on the deployment, approval feedback may arrive as an automated email or as a manual confirmation from the metadata curators. If you have just requested access, it is normal to wait for the approval step before the editing panels appear.
Understand the editing model
The Backoffice gets much easier once you separate three ideas:
- Groups decide which records you can work on.
- Roles decide which actions you can perform on those records.
- Entity type decides which part of the metadata you are editing.
Roles usually follow this model:
- Editor: creates drafts, updates their own drafts, and submits them for review inside the groups they belong to.
- Reviewer: reviews submitted drafts for the relevant group.
- Admin: manages users and metadata actions inside a group.
- Backoffice admin: has complete access across all groups and can see all drafts, submitted records, and administrative requests.
The editing path is hierarchical following the EPOS-DCAT-AP model:
- Data Product: the dataset-level record that stores the core catalogue metadata.
- Distribution: the concrete delivery channel for that Data Product.
- Web Service: the service details for a Distribution when the Distribution is exposed as a service.
- Operation: the callable interface of that Web Service, including its parameters.
For day-to-day work, the most important distinction is this:
- A Data Product is the conceptual catalogue record. This is where dataset-level metadata belongs, including persistent identifiers, contact points, and coverage.
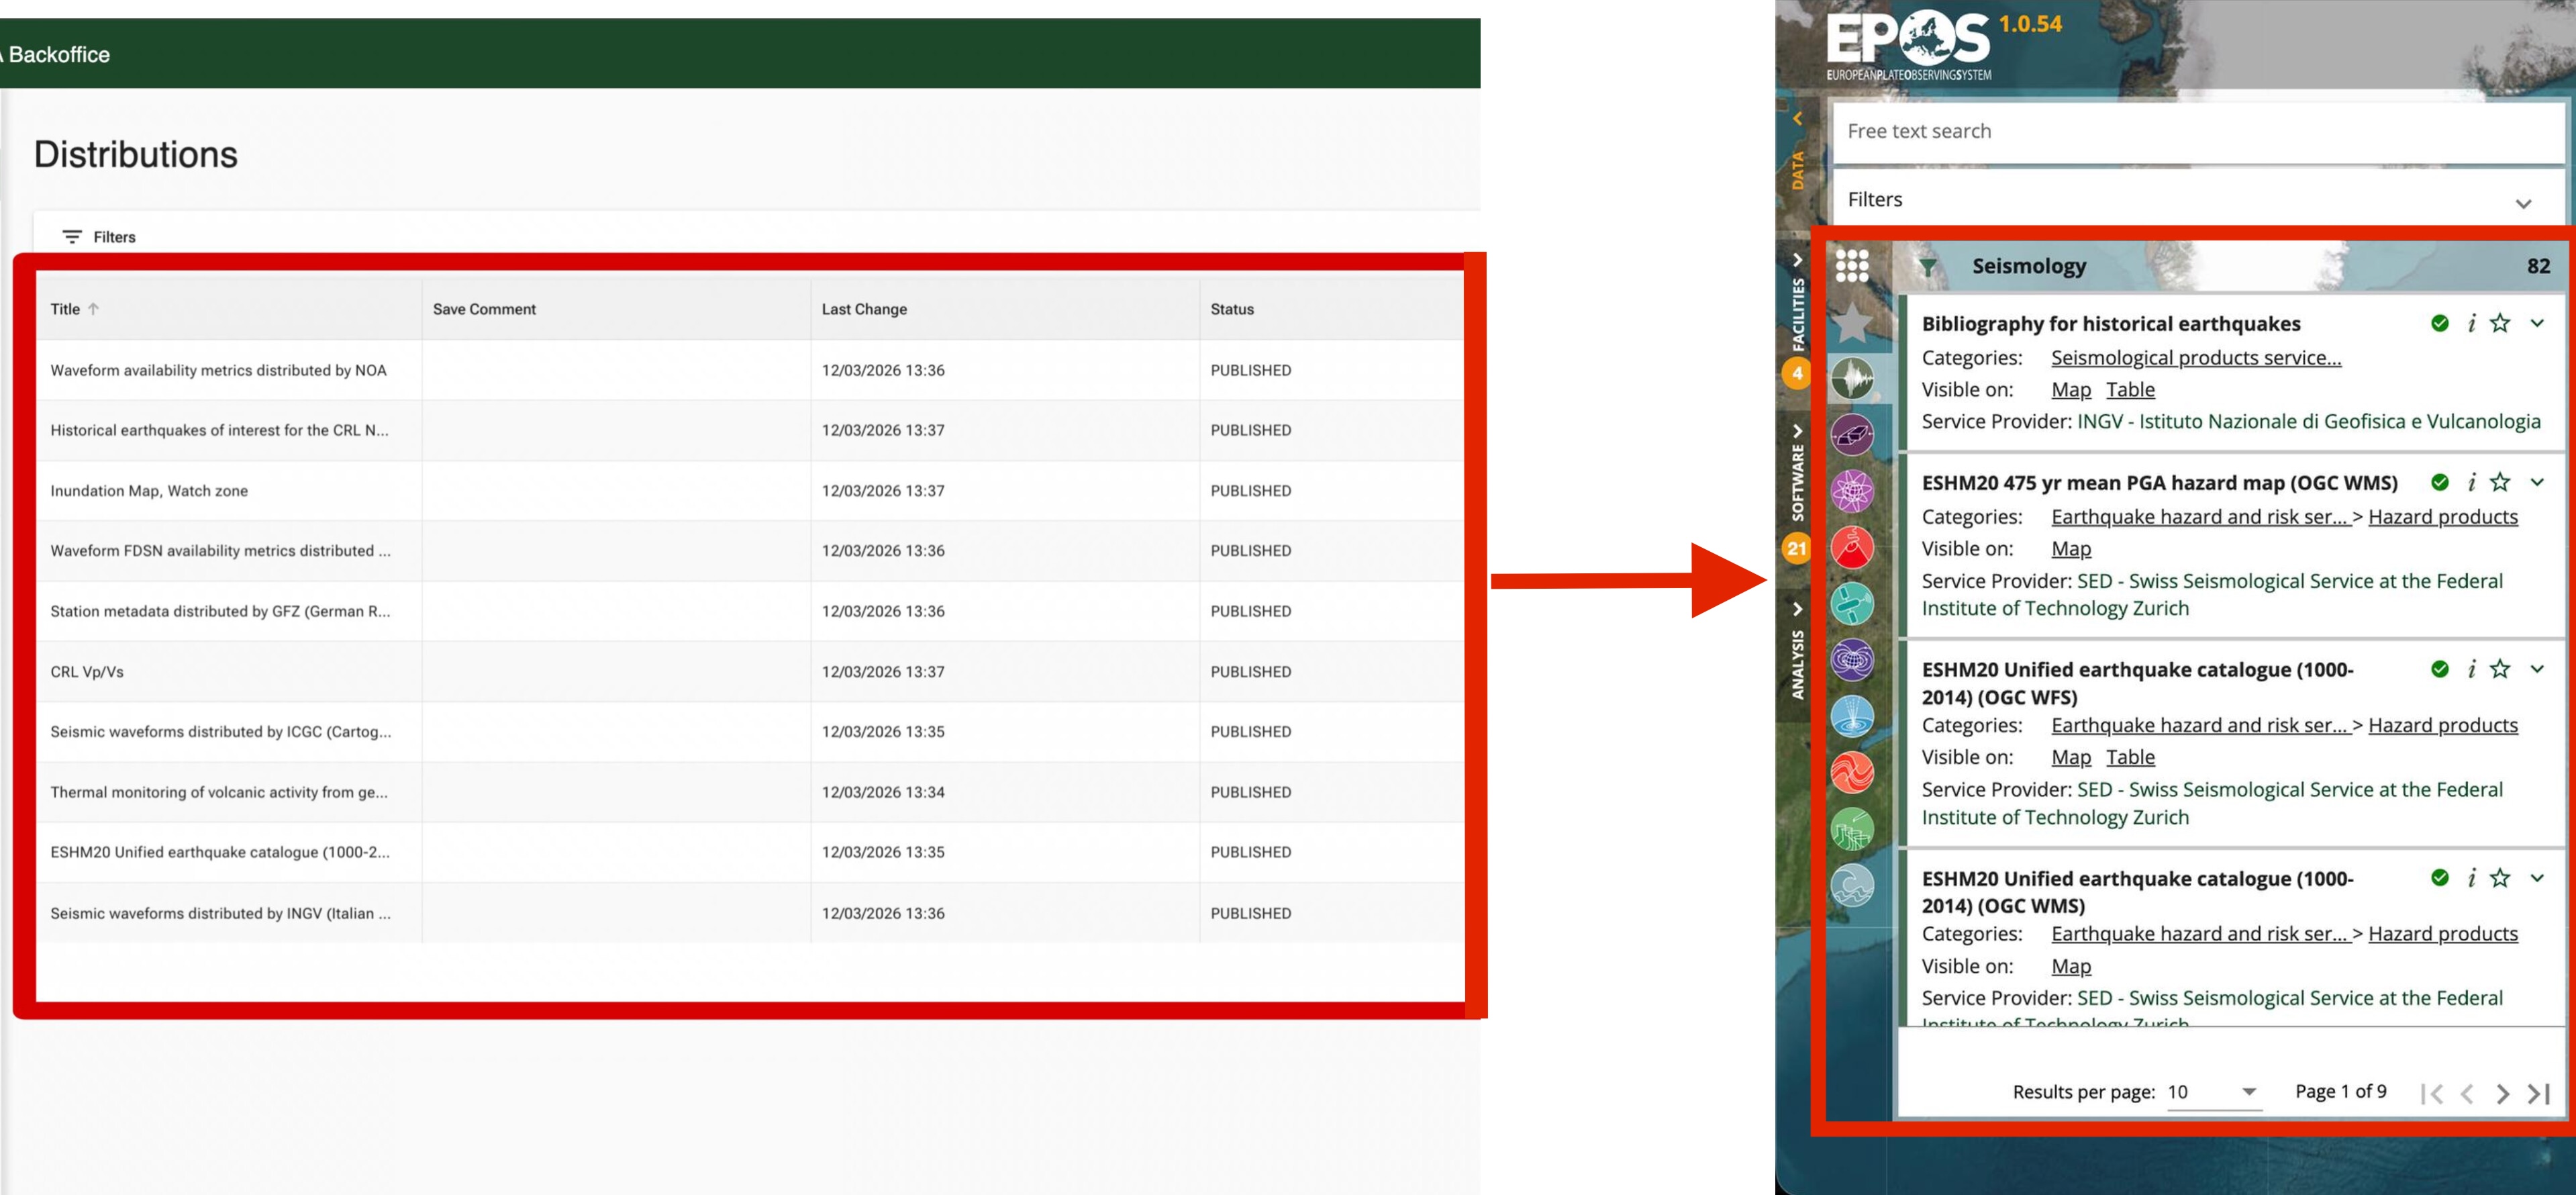
- A Distribution is the service entry that Platform users usually recognize by title when browsing the catalogue.
Update an existing service
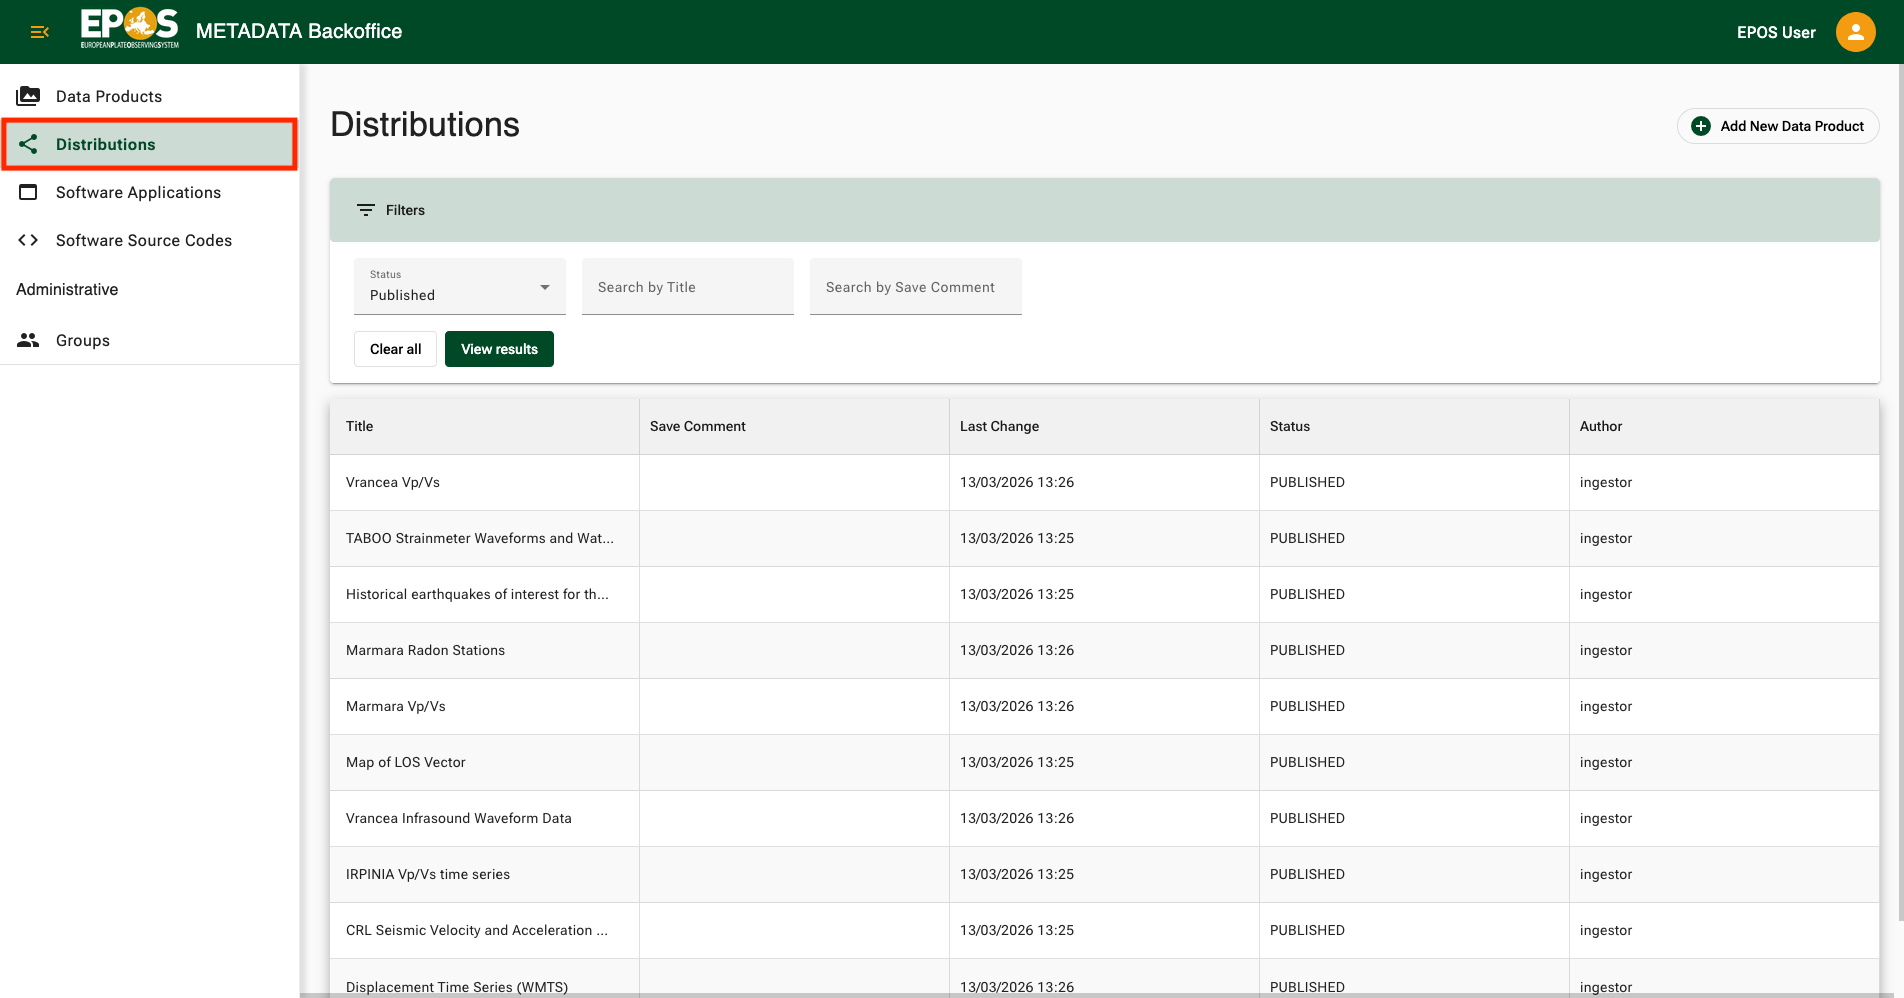
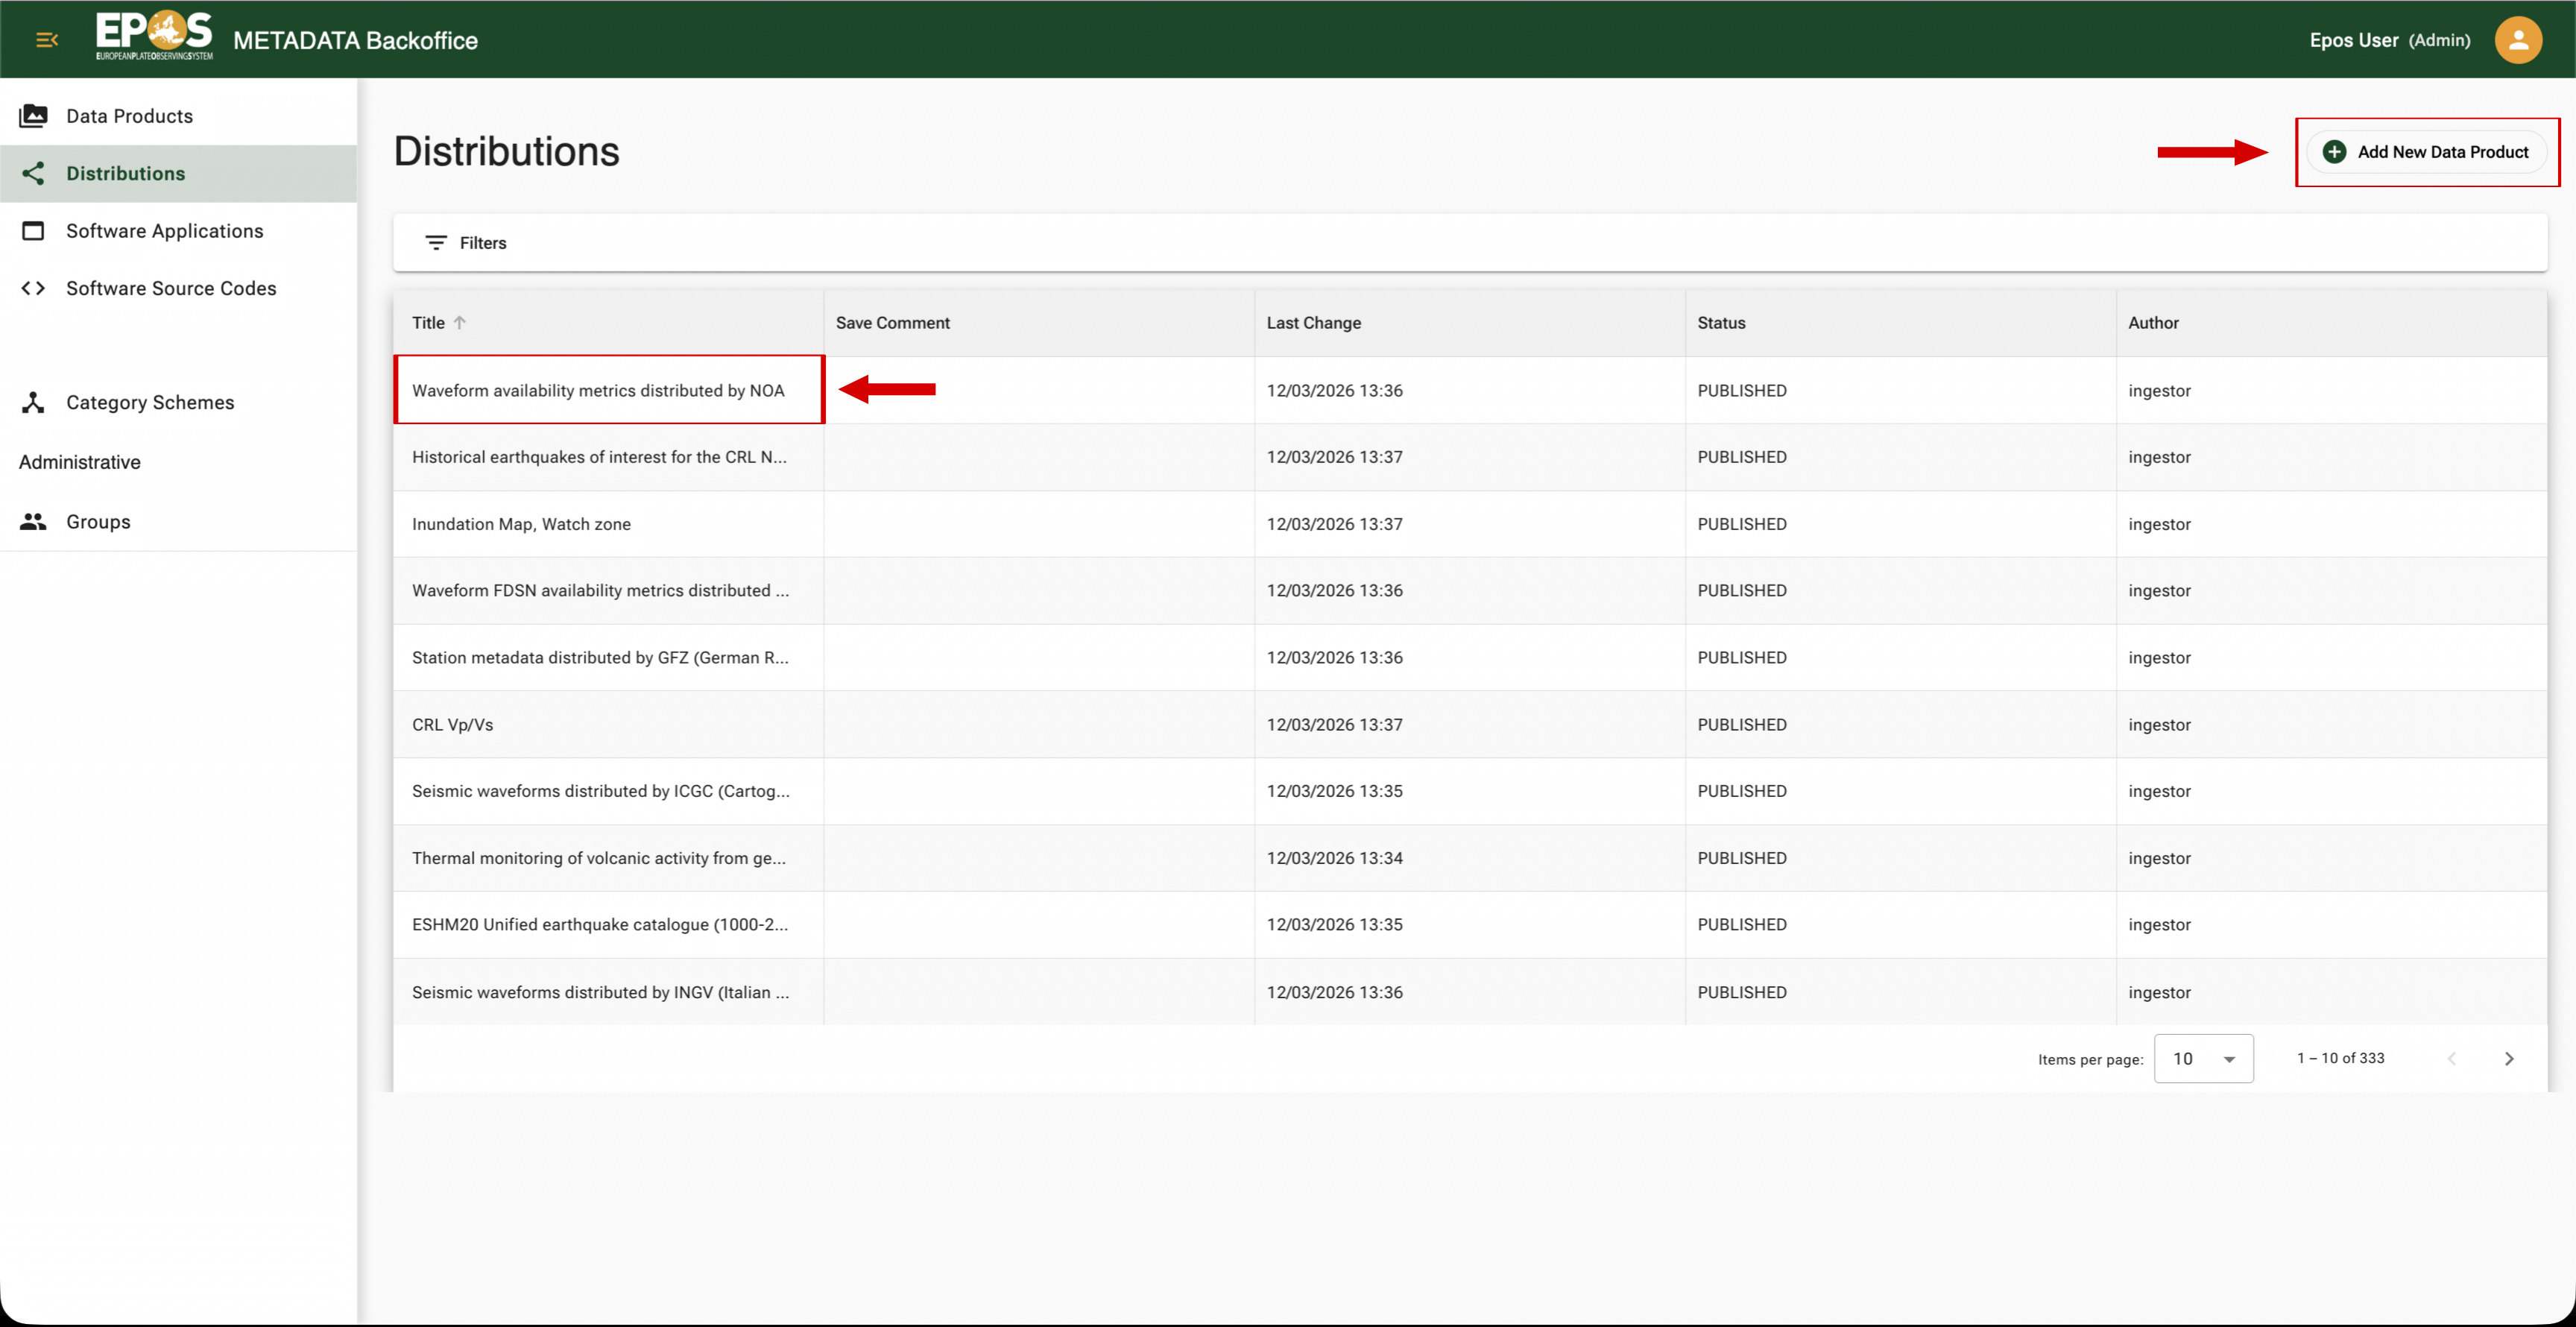
1. Start from the Distribution list
In most cases, start from Distributions, not from Data Products. That is the fastest path because the Platform exposes service titles at the Distribution level, so that is usually the title you remember.
Use the filters to narrow the list by status or title, then open the matching record.
2. Open the record
When you open a Distribution, the Backoffice may first land on the parent Data Product editor. That is expected: the Distribution belongs to that Data Product, and the left-side internal navigation lets you move between dataset-level sections and distribution-level sections.
3. Create a draft
If the record is already published, create a draft before changing anything.
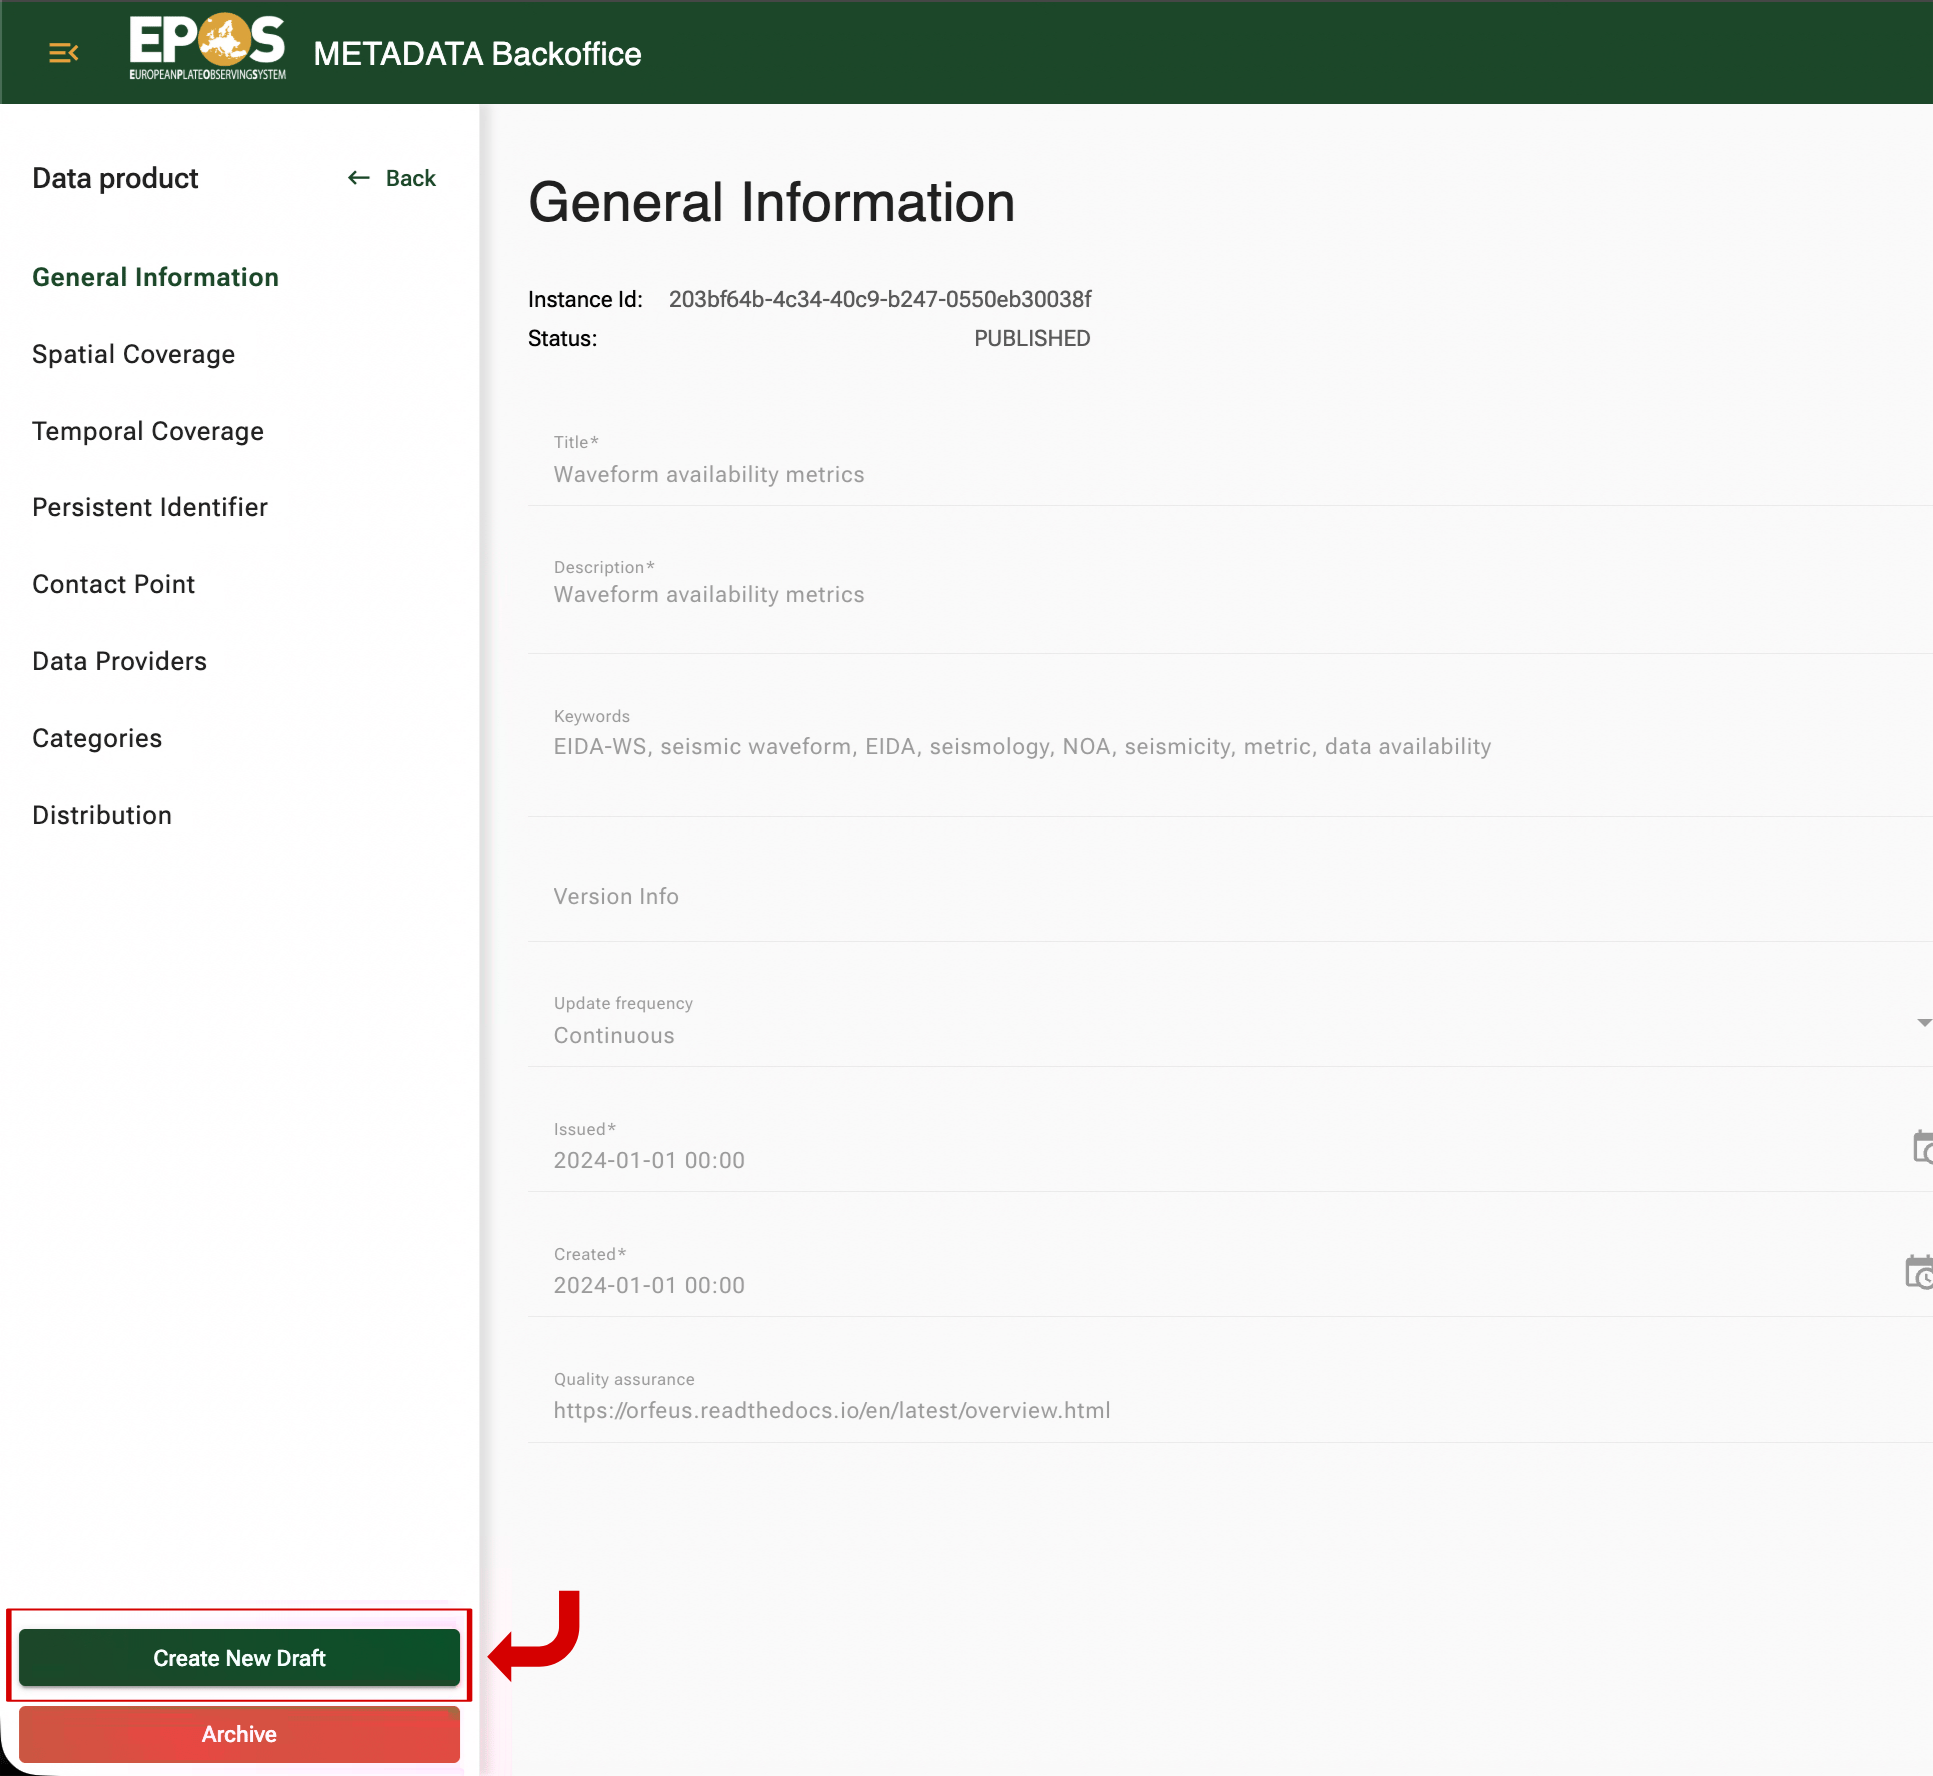
DRAFT is the editable working copy of the metadata. You can save it, preview it, and submit it for review when you are ready.
Keep these rules in mind:
- You can create only one draft per user per asset at a time.
- If you want to start over, delete your draft first and create a new one.
- If you need to understand what changed between your draft and an older version, use Version History.

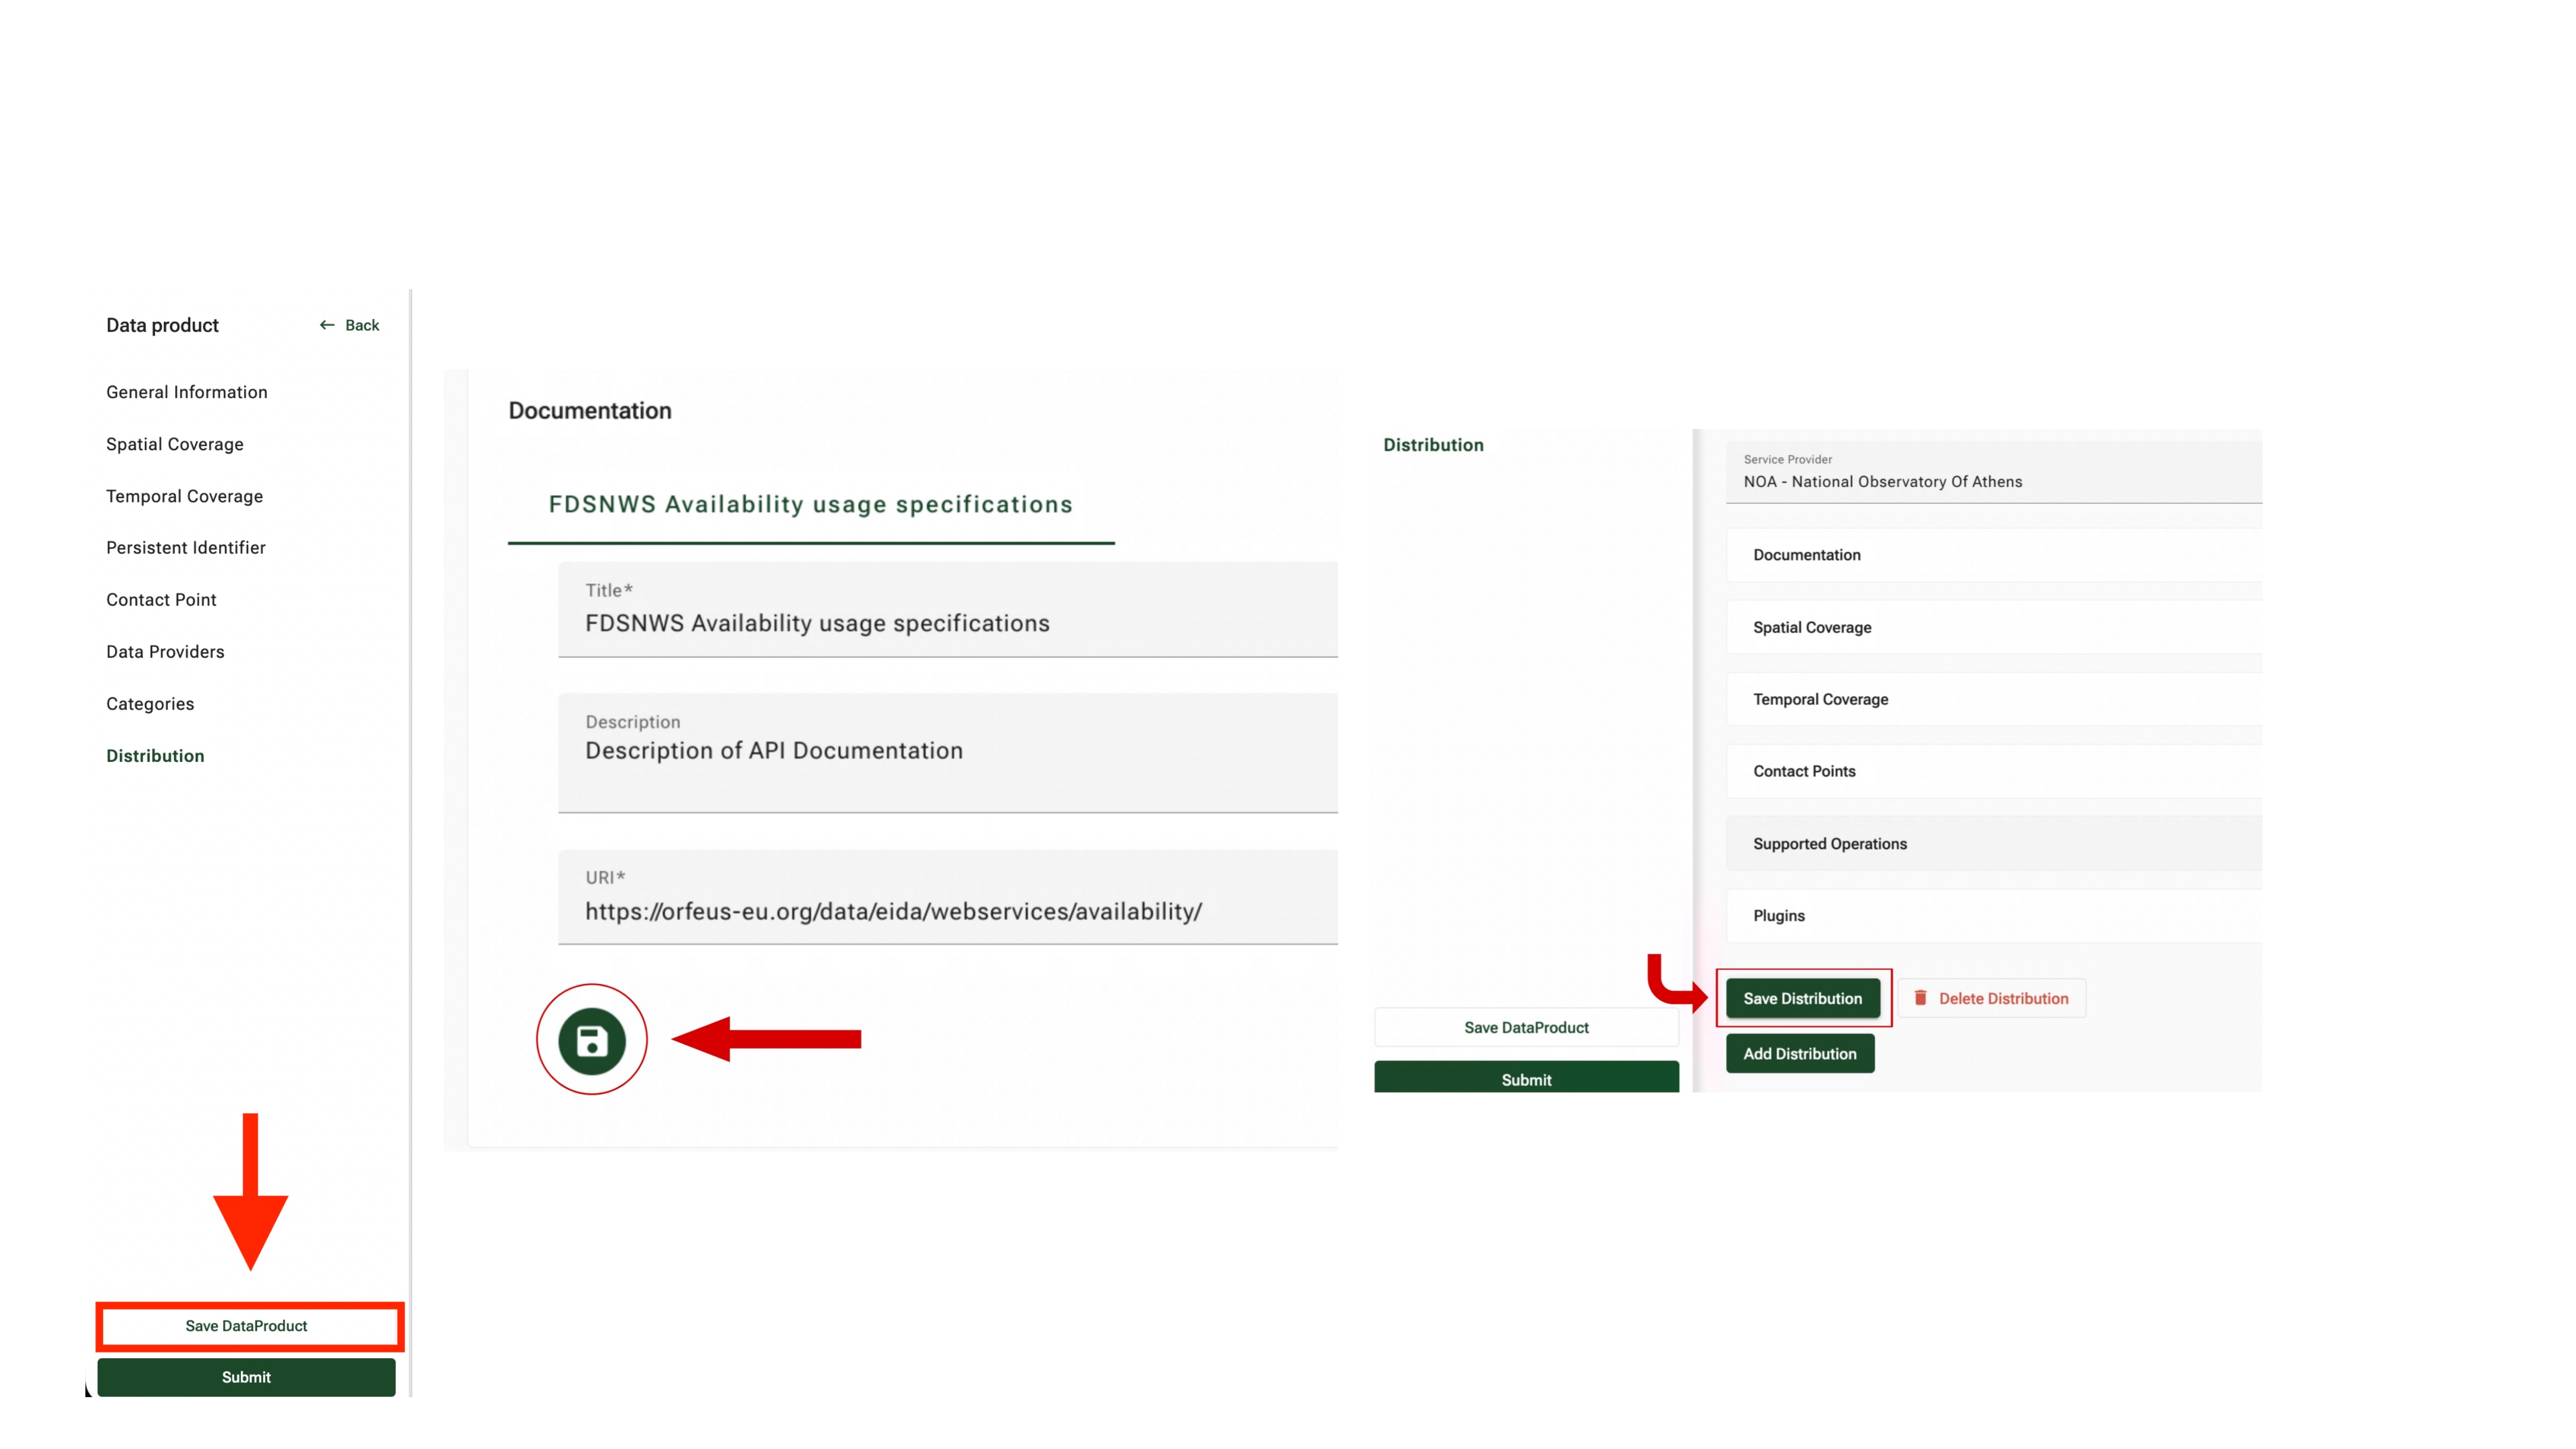
4. Save every section you change
Saving is one of the most important parts of the Backoffice workflow.
If you edit a Distribution section, save the Distribution.
If you edit a Data Product section, save the Data Product.
If you edit an operation, save the operation first, then save the Distribution.
If you move away from a section without saving, your latest edits may not be stored.
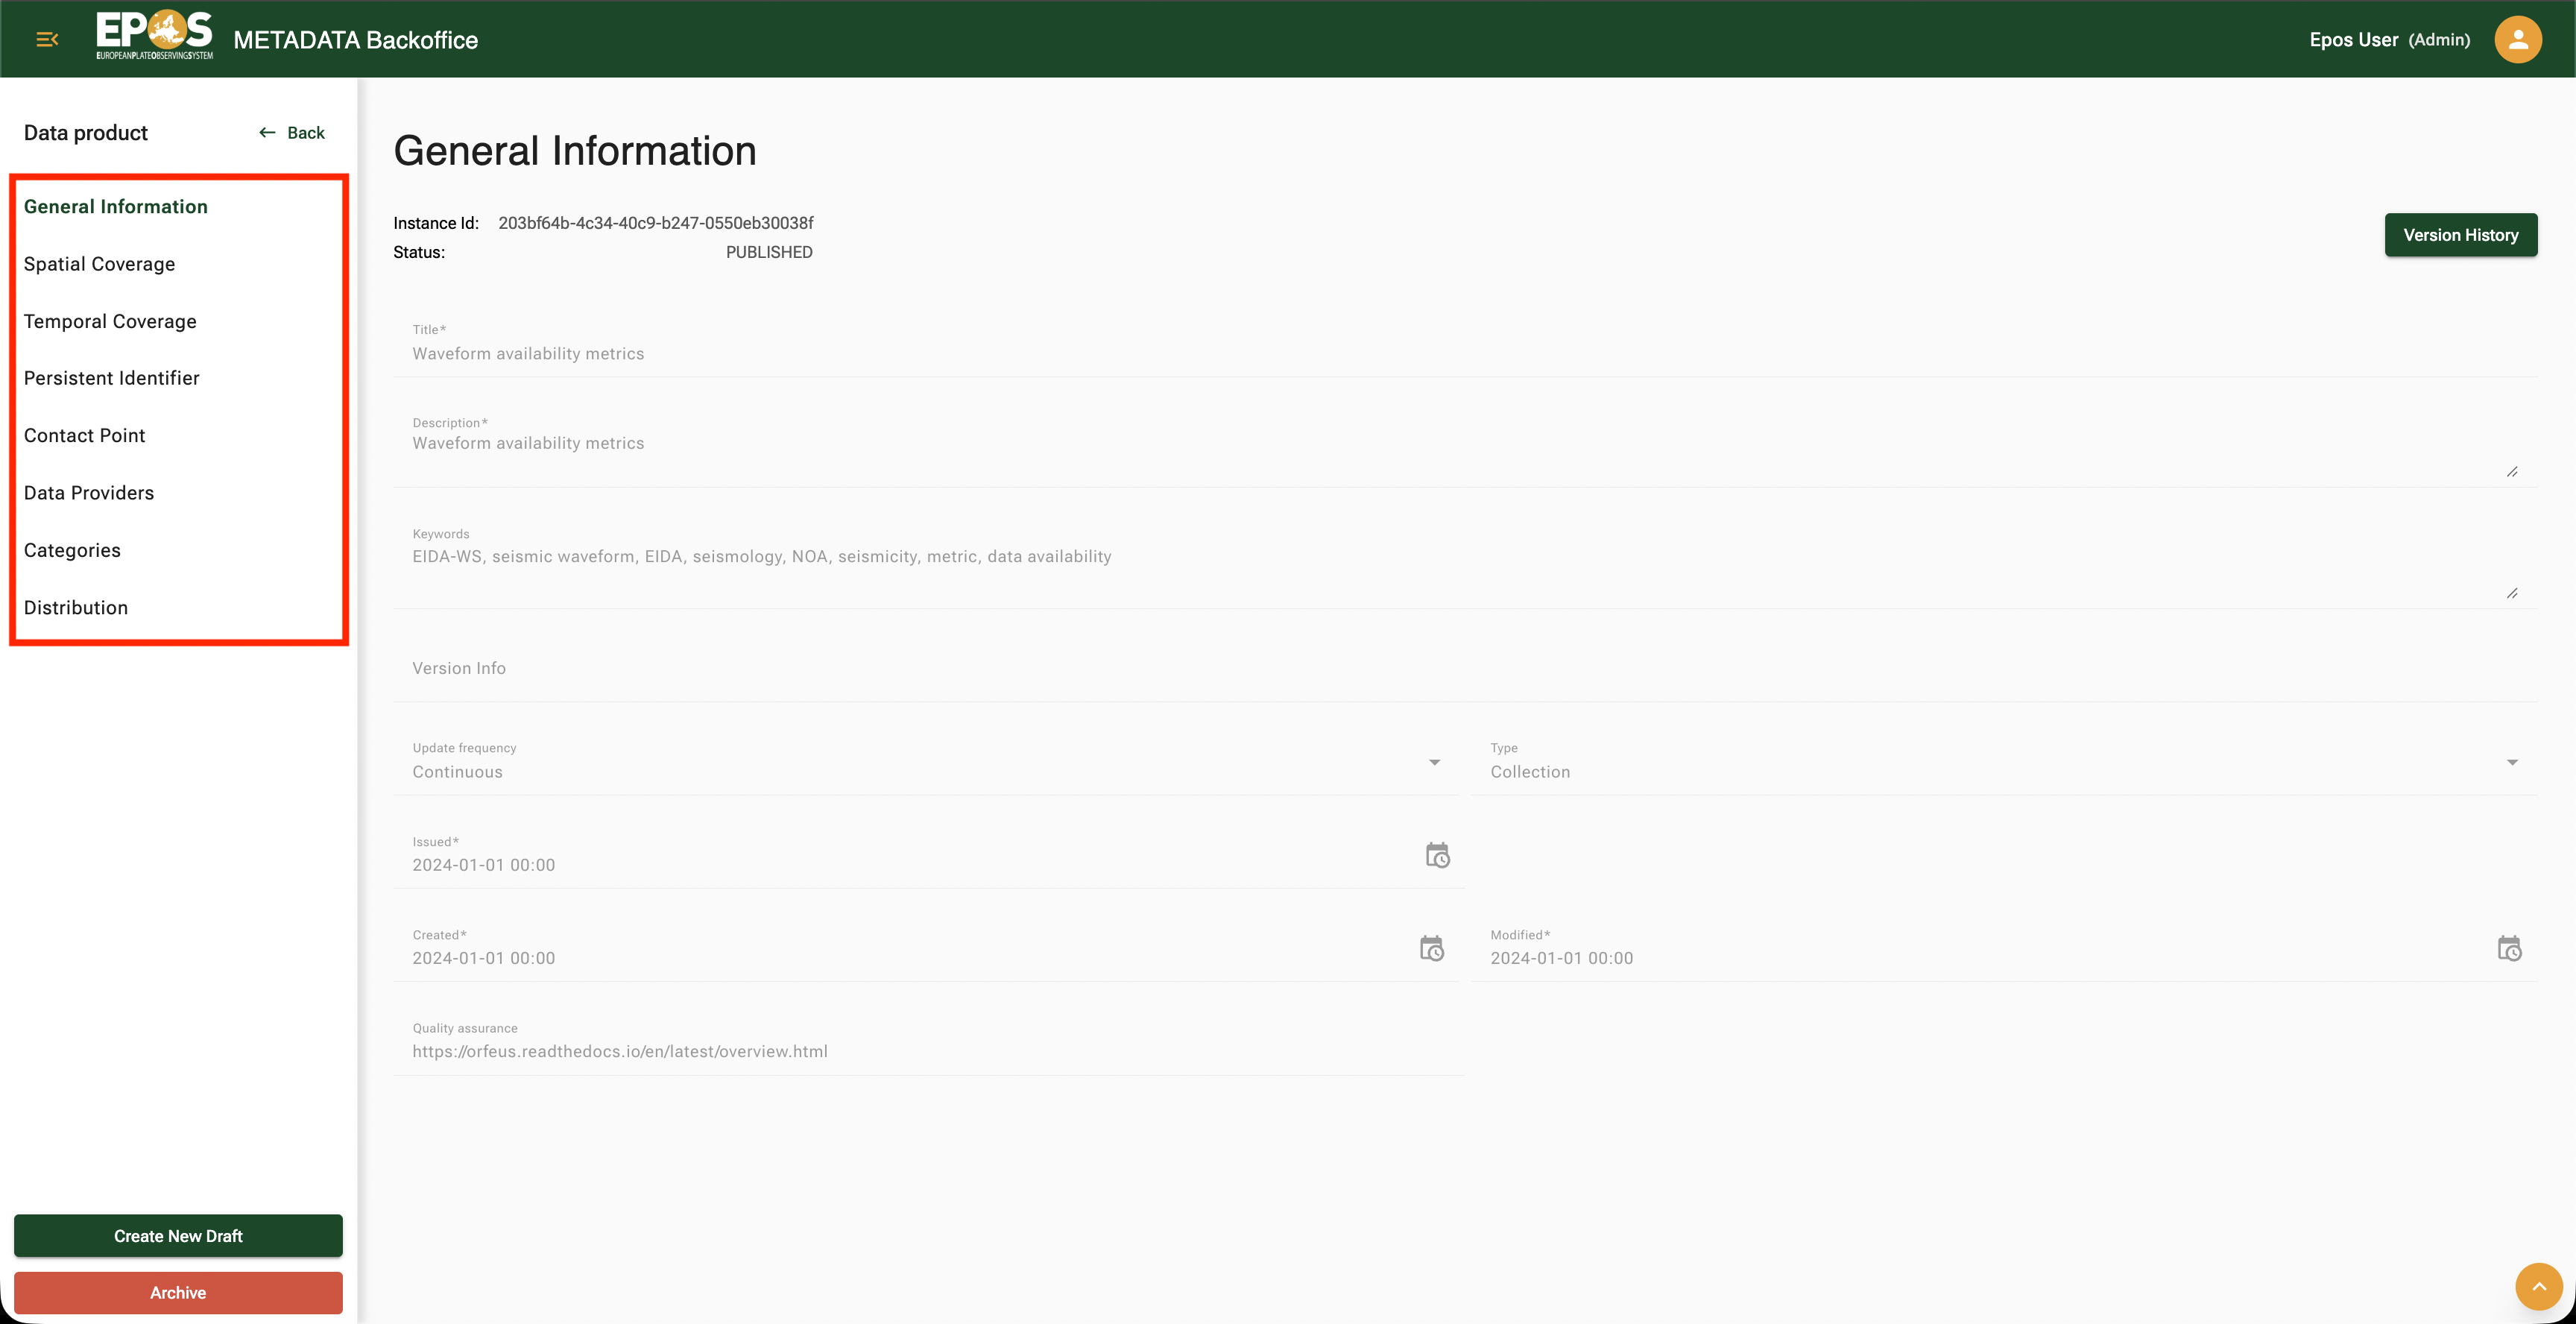
5. Edit the Data Product fields
Use the internal sidebar to move through the Data Product sections when you are changing dataset-level metadata such as the title, description, identifiers, contact points, or coverage.
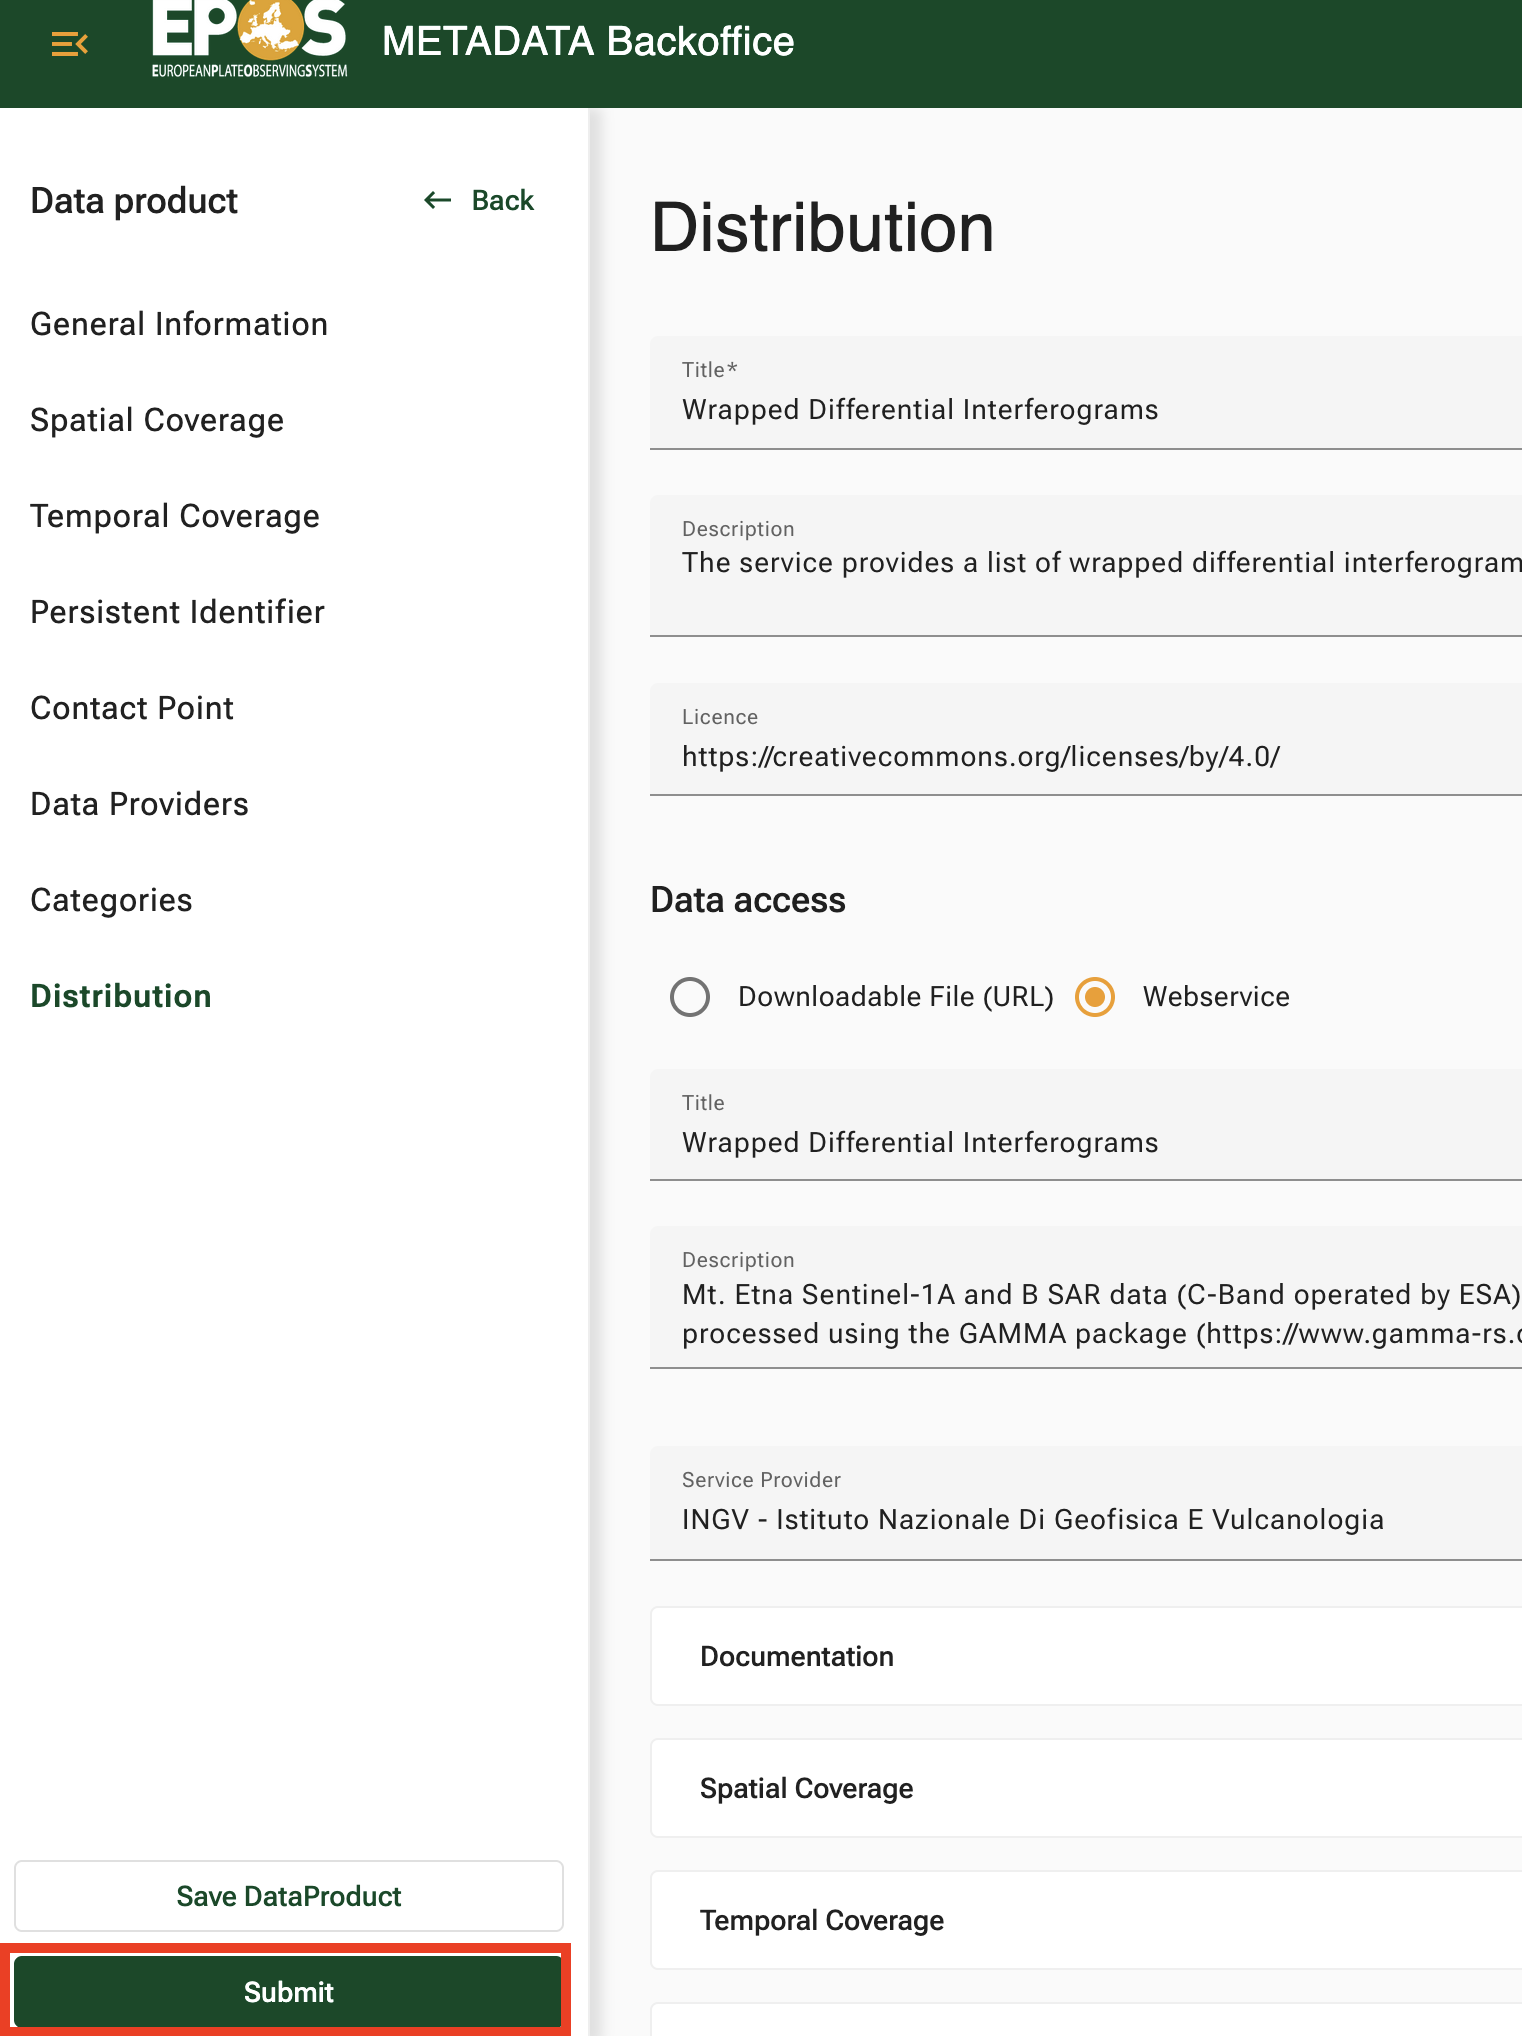
6. Edit the Distribution fields
Use the Distribution section when you are changing the service entry users interact with on the Platform.

This is where you typically update the service title, description, provider details, documentation, and distribution-specific settings.
7. Update the supported operation if needed
If the Distribution is a web service, open Supported Operations inside the Distribution editor.
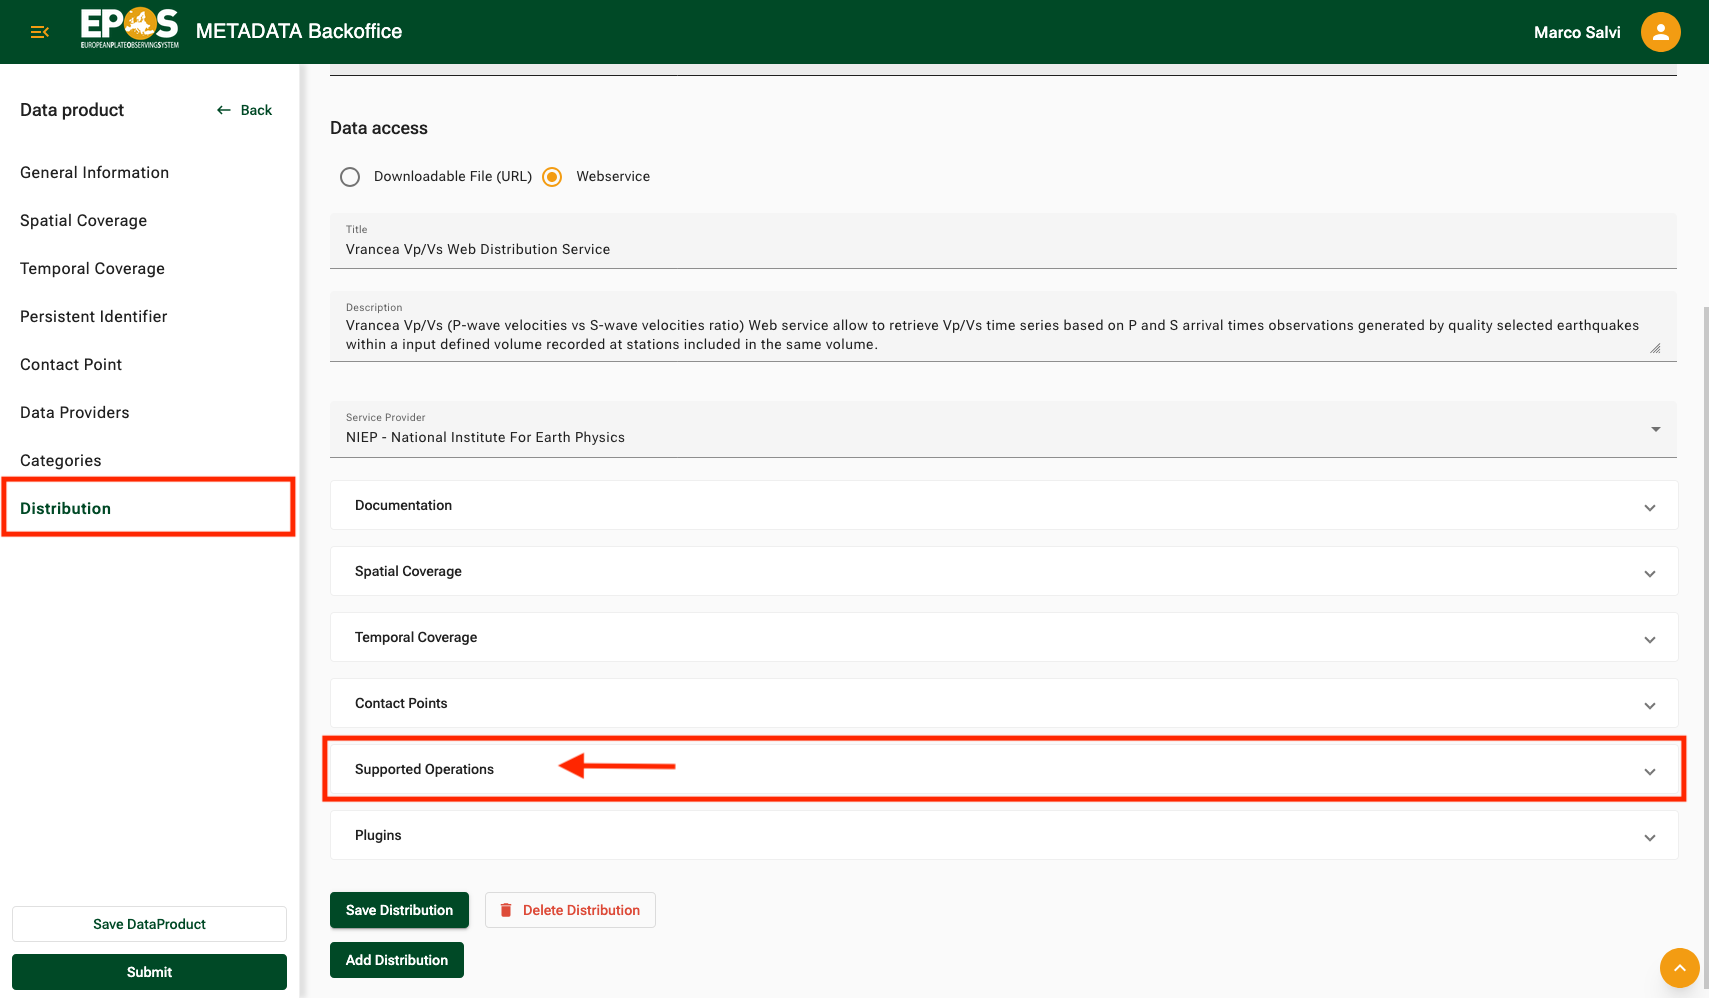
This section controls how the Platform builds calls to your service. Use it to define the URI template, the returned format, and the parameters that users can send to the service.
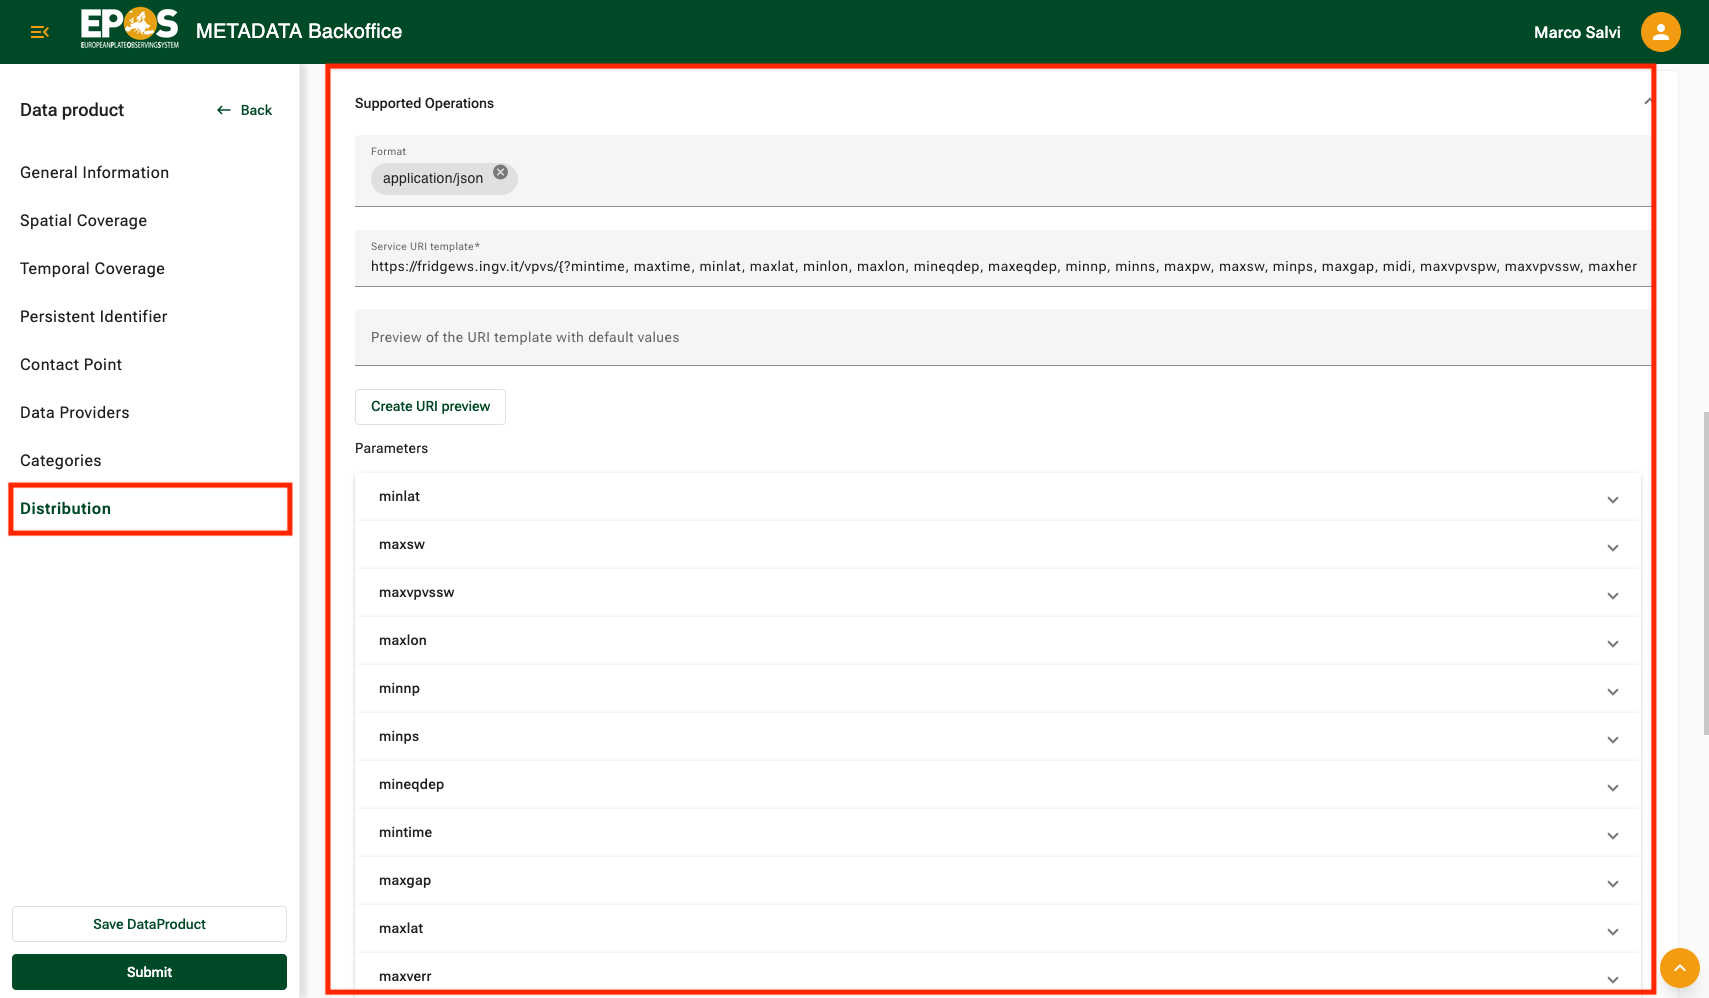
When editing an operation:
- keep the parameter names in the URI template consistent with the parameter definitions below it
- define each parameter clearly: name, value type, description, required flag, read-only flag, default value, and range or allowed values when applicable
- use read-only when a parameter must always keep its fixed default value
- use Create URI preview to generate a concrete request URL with the current default values, then test that URL in a new tab
If you need to add a new parameter, make sure the parameter name is already present in the URI template string before you add it. That is the reliable way to keep the operation configuration aligned.
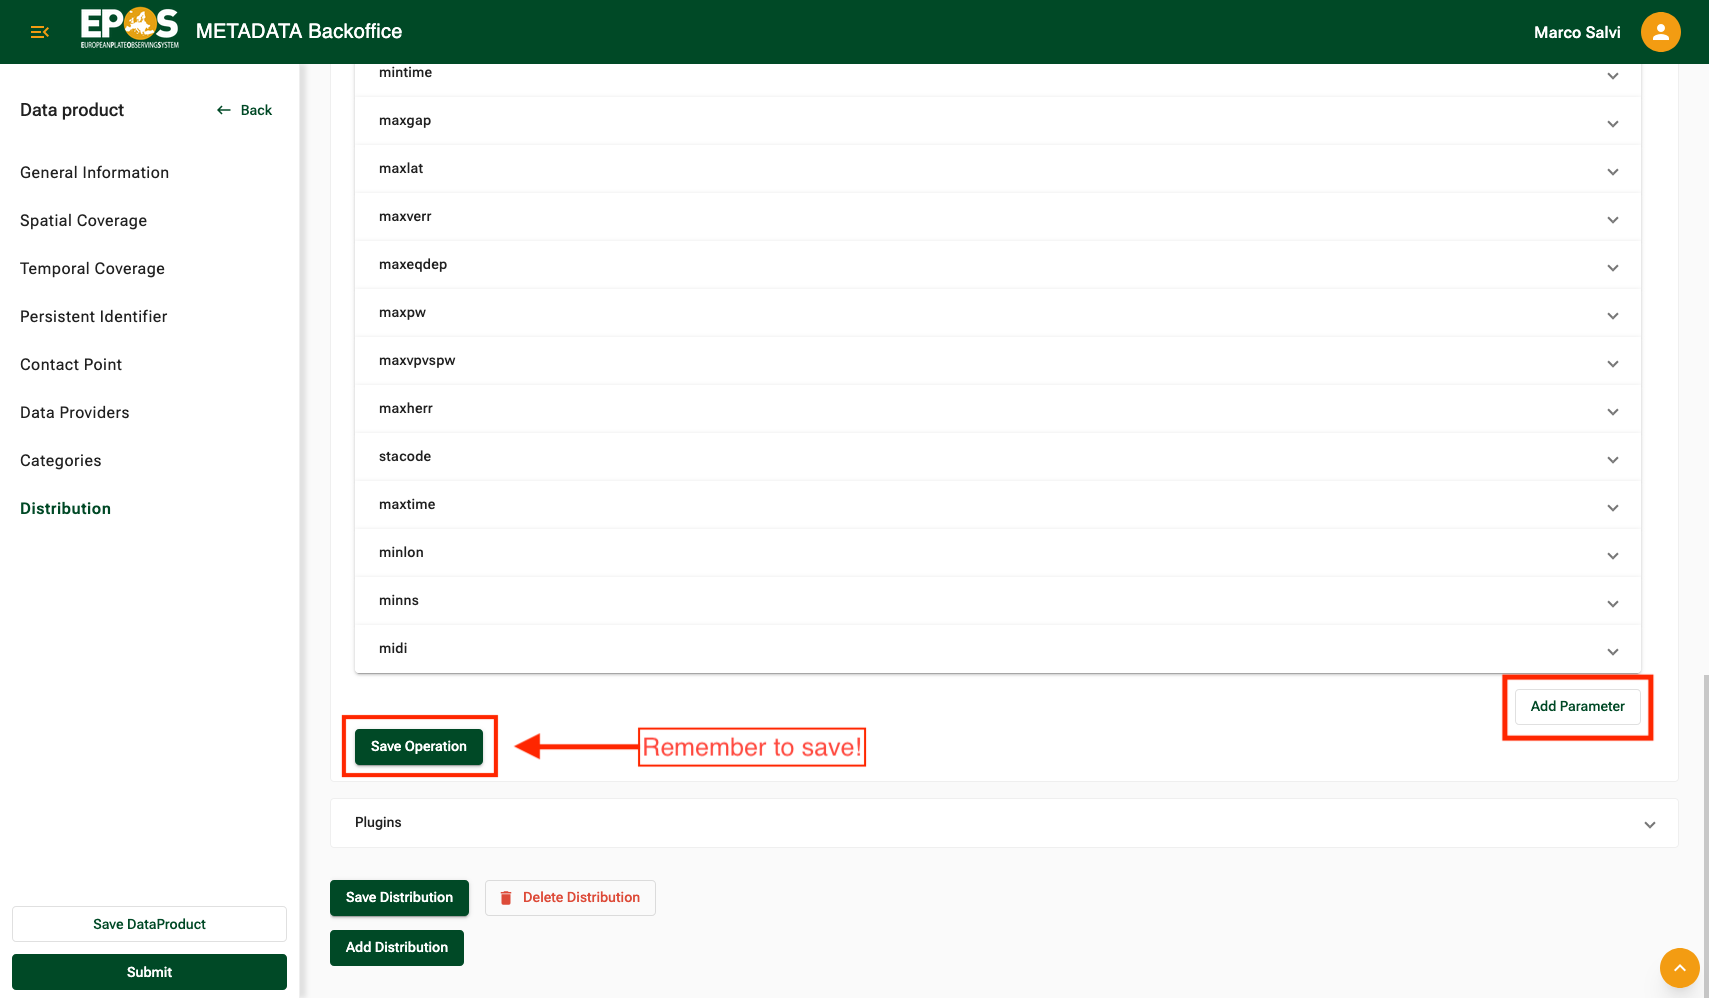
This section also drives user-facing behavior in the Platform. If you need to change the available filter choices or default values exposed to users, update the relevant operation parameter here.
After changing operation parameters, click Save Operation. Then save the Distribution as well. If the URI template and parameter list drift out of sync, the service configuration becomes unreliable.
8. Update plugins if needed
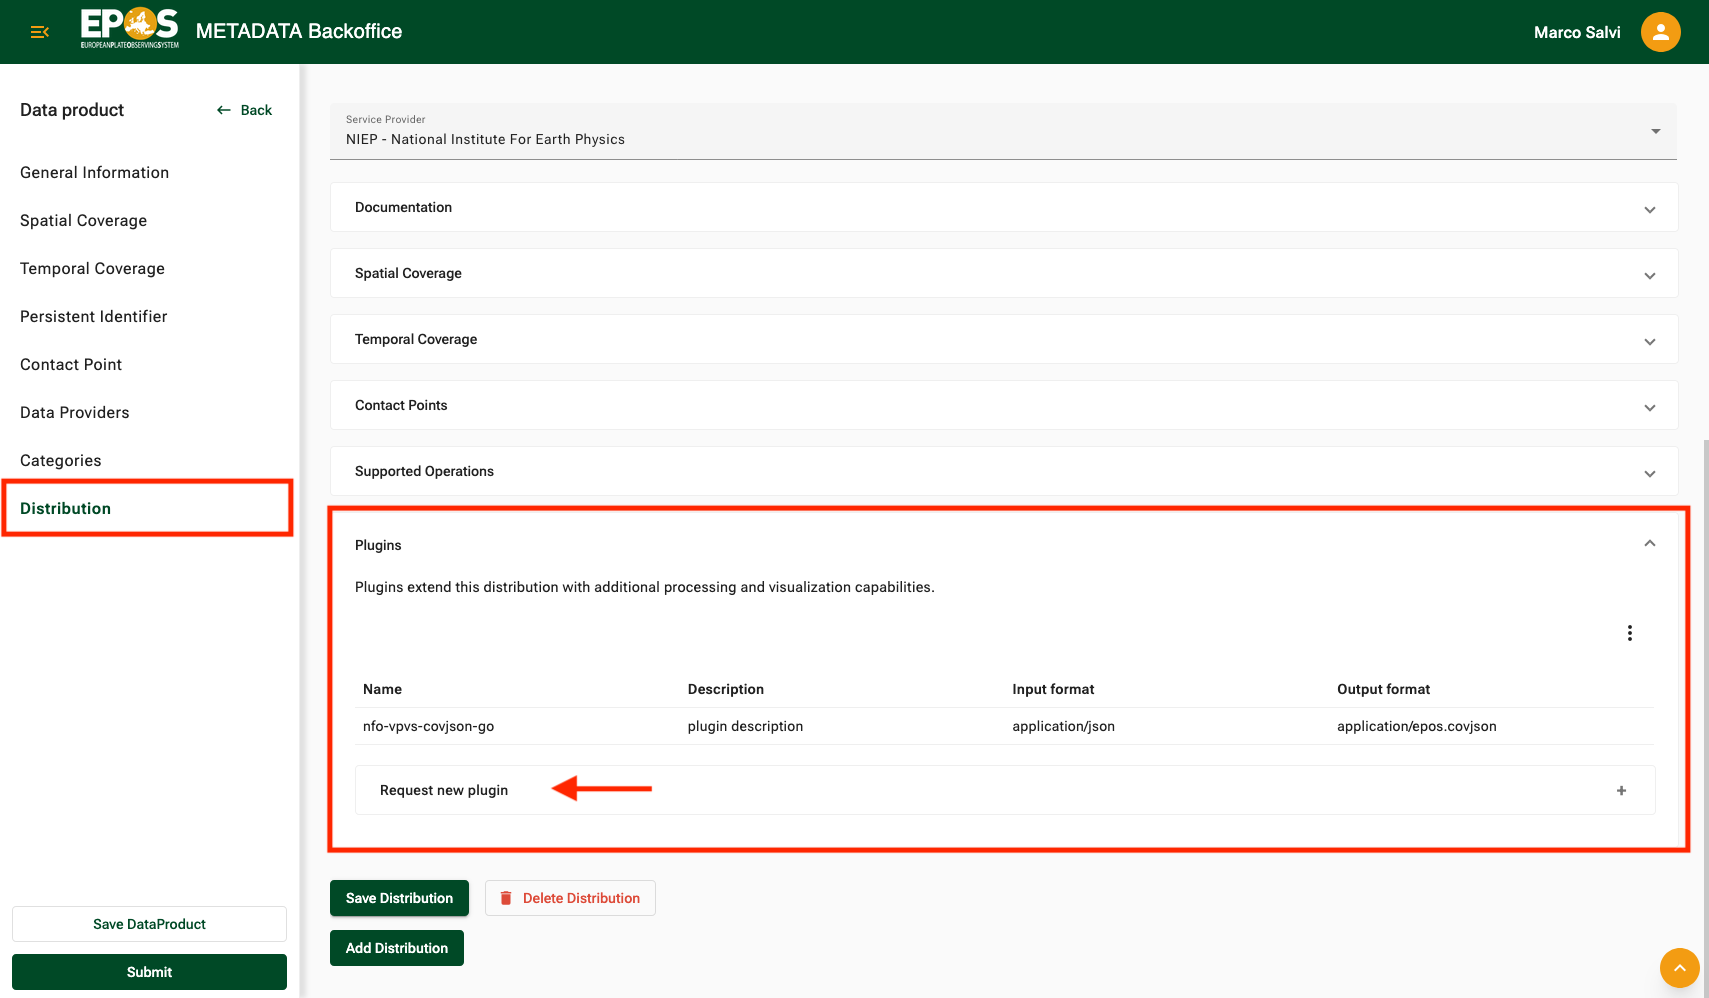
Open the Plugins section inside the Distribution when your service returns data in a format that the Platform interface does not support directly.
The Platform can work directly with formats such as GeoJSON, CoverageJSON, WMS, WFS, and WMTS. If your service returns a different format, you can request a custom conversion component called a plugin that transforms the original response into a format the Platform can display.
Plugins are managed by the Plugin Managers group. Normal users cannot create or edit plugins directly in the Backoffice for security reasons. Instead, use the Plugins section when you need to:
- see the plugins currently associated with the service
- request a new plugin
- request an update to an existing plugin
- request that an existing plugin be associated with or removed from the service
 When you submit a plugin request, an email is sent to the contact points in the Plugin Managers group. They review the request, implement the required plugin or plugin update, and let you know when the request has been fulfilled.
For more detail about how plugins work and how they are developed, see Converter Plugins.
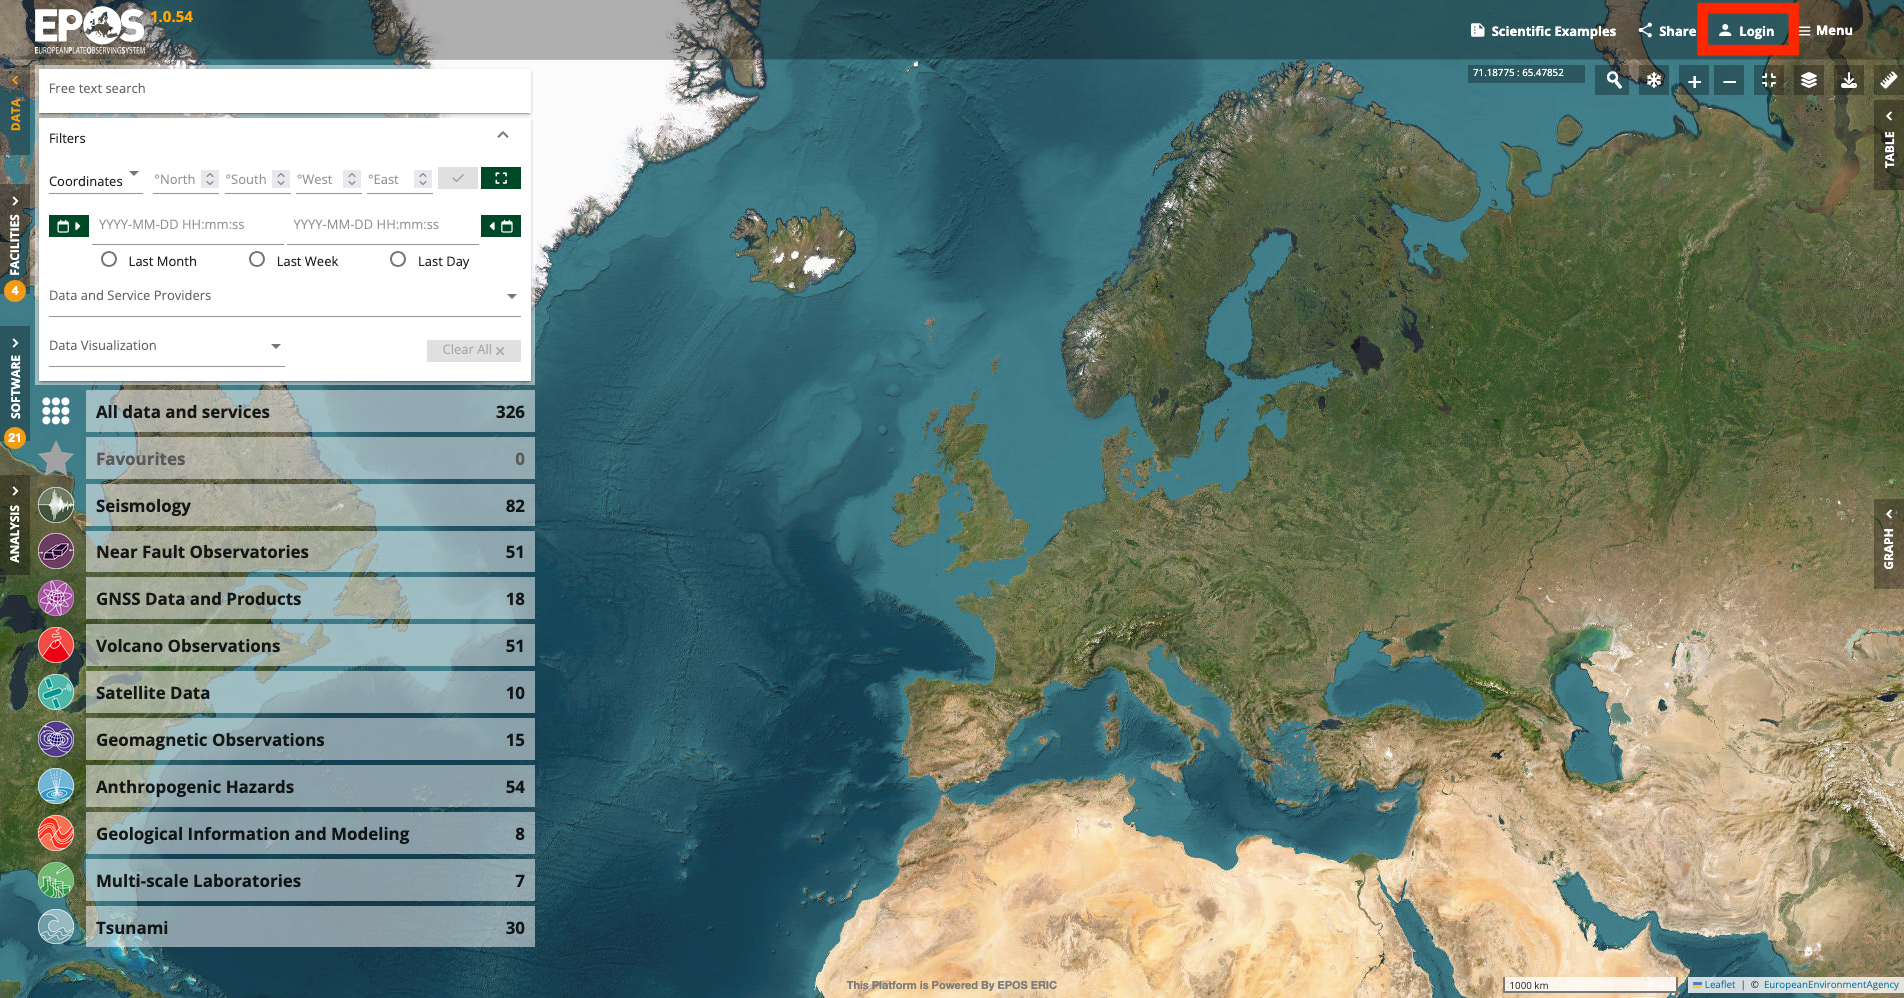
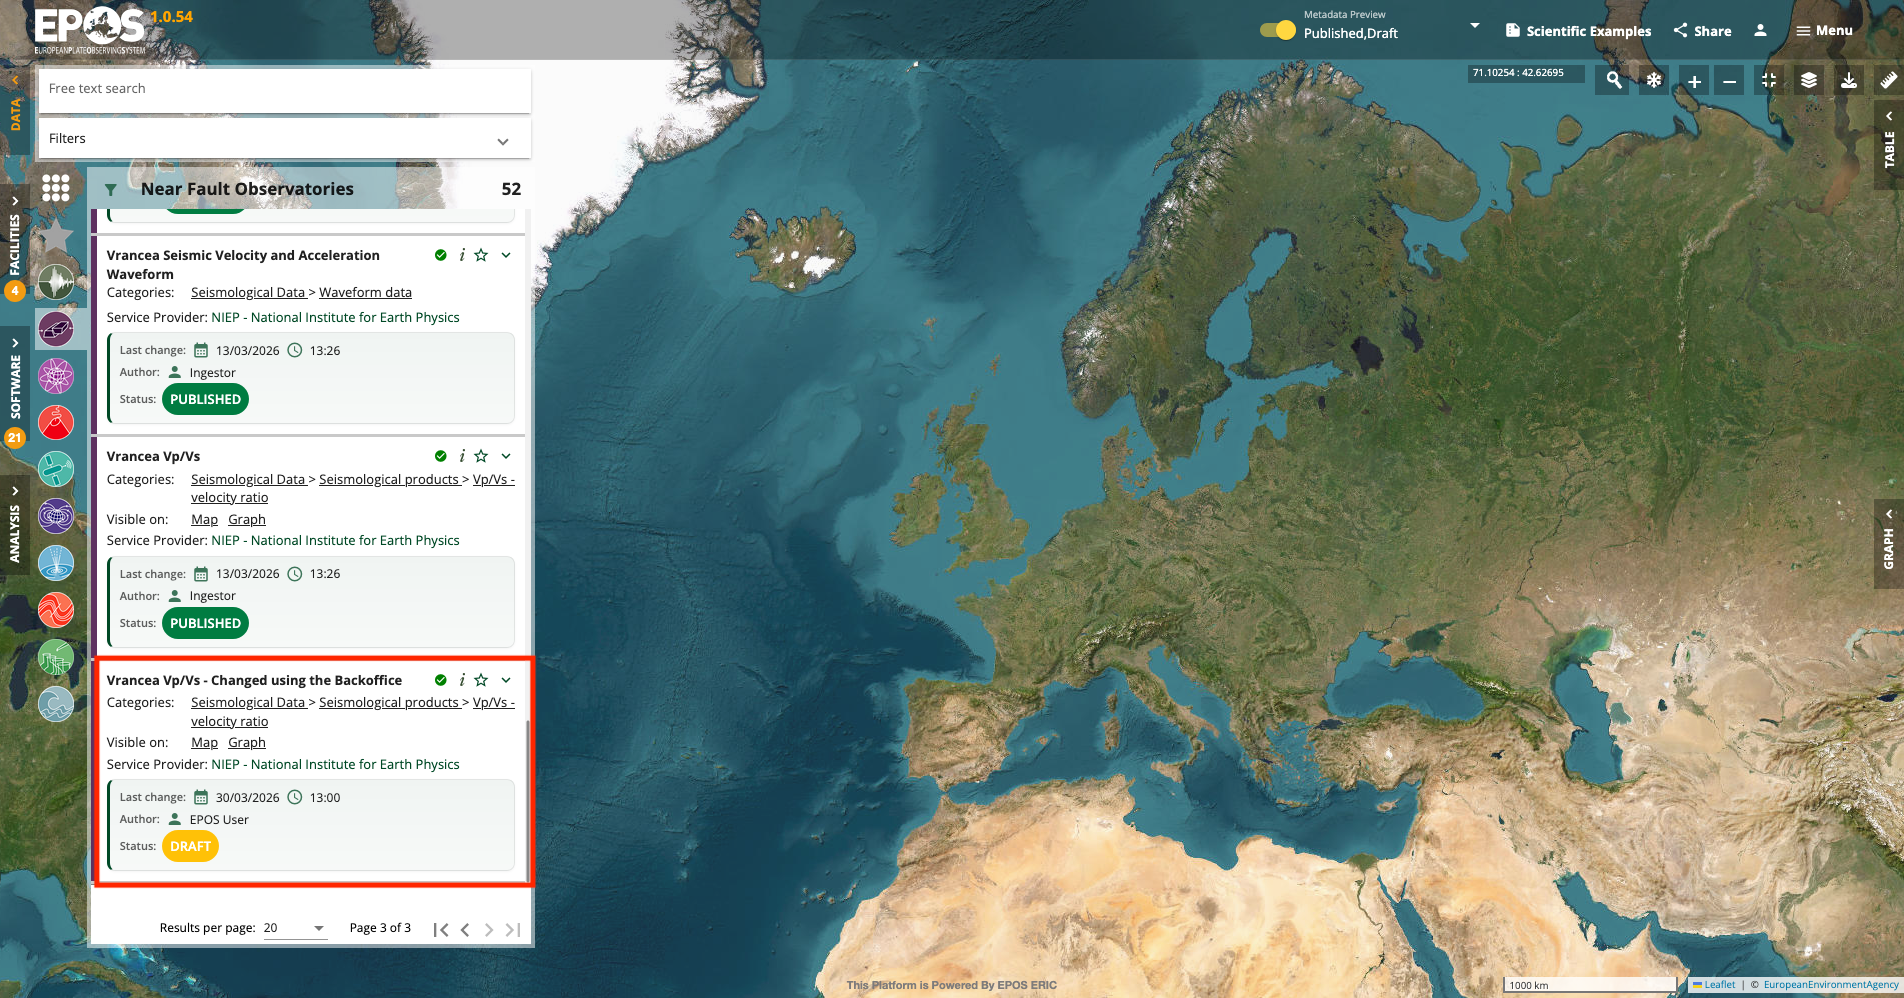
9. Preview your draft on the Platform
After you make changes to the record, you can preview how the updated Data Product, Distribution, or other editable metadata would look on the Platform before you submit it for review.
- Open the main Platform interface.
- Log in with the same email you used in the Backoffice.
- Enable Metadata Preview when the prompt appears, or enable it later from the Platform header.
- Add
Draftto the types of records to show. - Look for your draft in the results list.
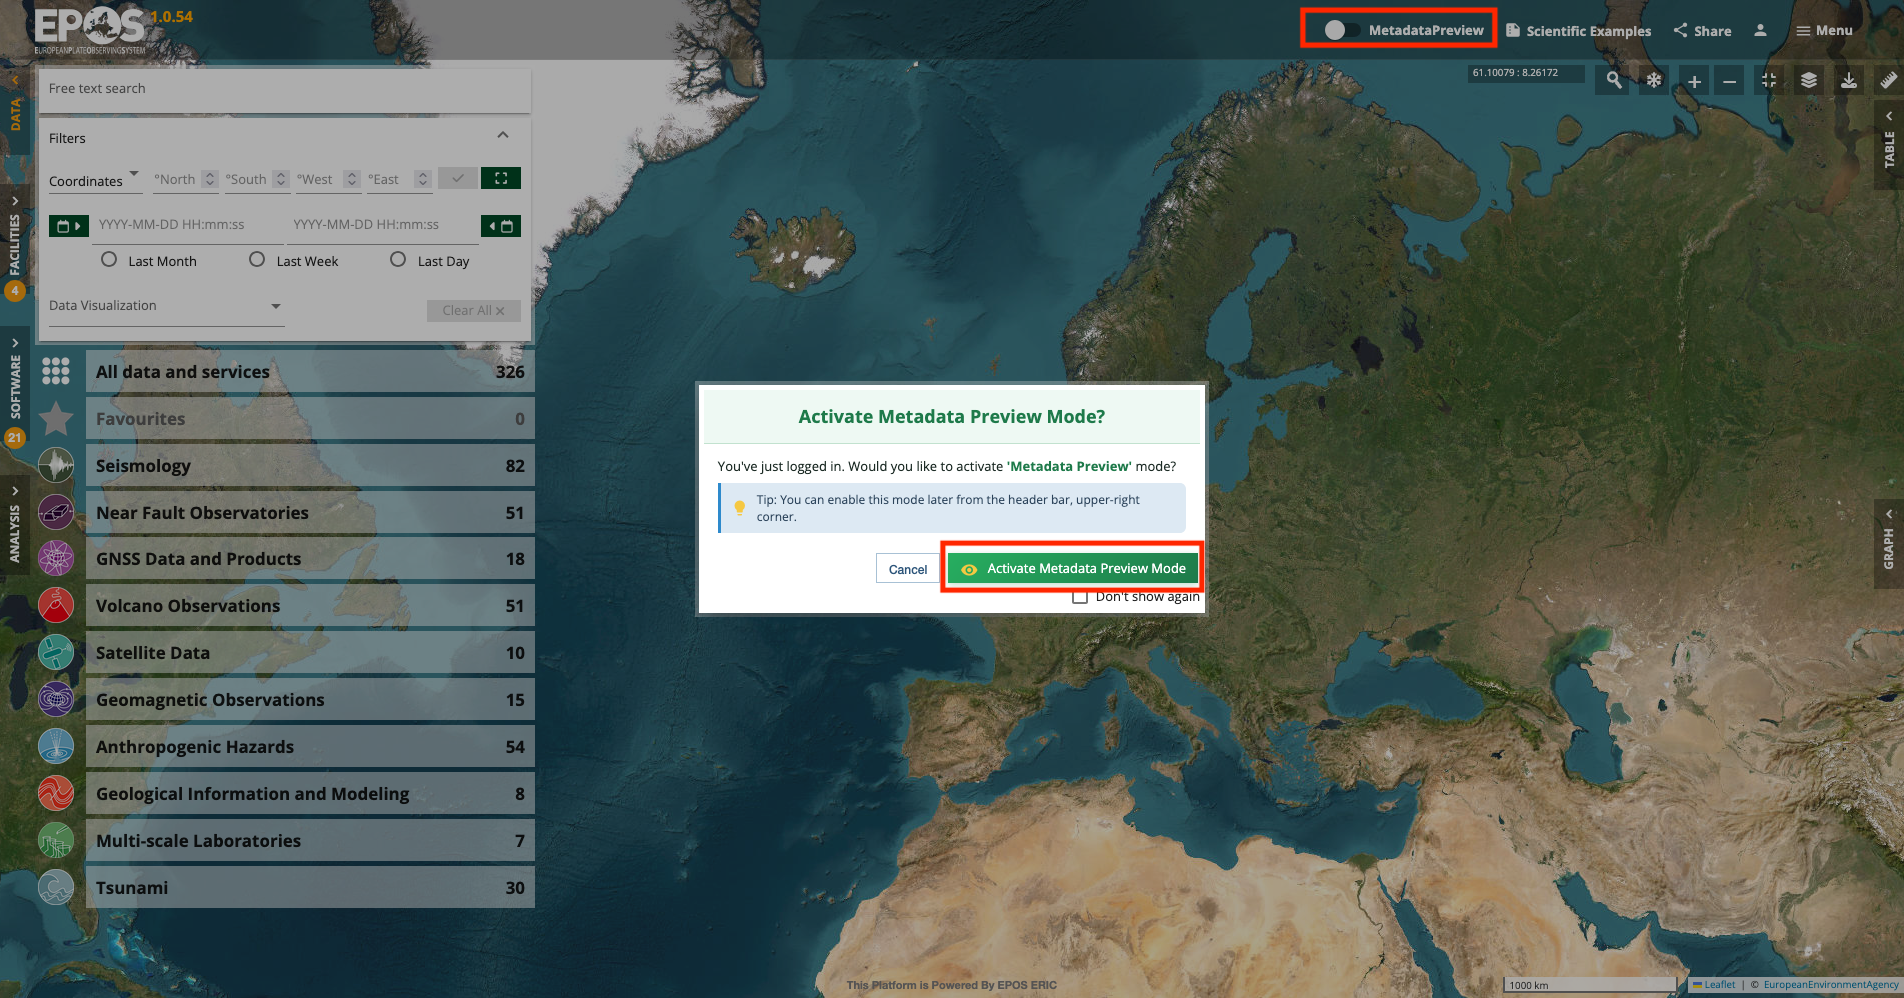
Once preview mode is active, you can inspect your draft directly in the Platform interface instead of only the public catalogue view. This lets you check how the record would look on the portal if it were published.
Keep these details in mind:
- Metadata Preview is available only to users who have Backoffice access.
- Normal Platform users who do not have Backoffice access cannot see the Metadata Preview controls and cannot see draft records.
- Your draft is visible only to you, your group admins, and Backoffice admins.
- Other Backoffice users cannot see your draft.
- Preview updates may take a few minutes to appear, especially on big environments.
For more context on the main Platform interface, see How to explore the Platform interface.
10. Submit the draft for review
When the draft looks correct in preview mode, go back to the Backoffice and click Submit.
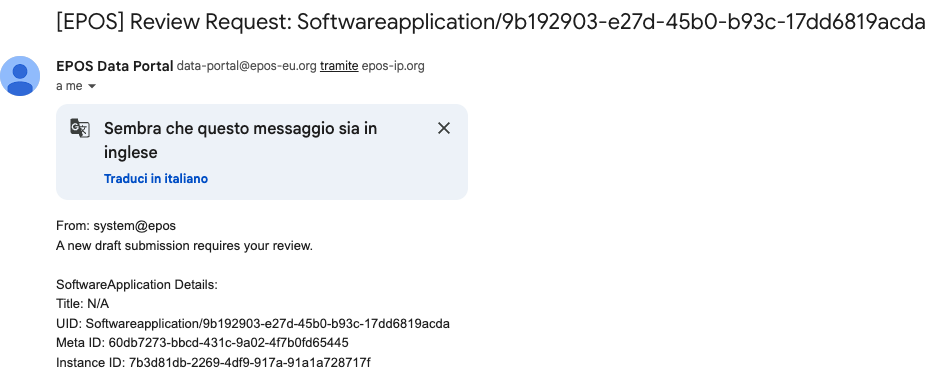
SUBMITTED means the draft is waiting for review. Submitting does not publish the record immediately. It sends a notification email to all contact points in the Metadata Curators group, who then review the changes and decide whether to publish or discard the submission.
11. After review
If the draft is approved, it becomes the new PUBLISHED version. The previously published version is automatically moved to ARCHIVED, so the history is preserved.
If the draft is rejected or discarded, update it again and submit a new revision.
Create a new entry instead of updating an existing one
If you want to create a new Data Product from scratch, use Add New Data Product from the Data Product or Distribution area.
After the draft exists, the same overall workflow applies:
- fill in the Data Product metadata
- add at least one Distribution
- complete the Web Service and Operation details when the Distribution is a service
- save each section you changed
- preview the result on the Platform
- submit the draft for review
The more complete the Data Product and Distribution metadata are, the better the catalogue entry will behave and the easier it will be to review.
Current limits and deployment-specific behavior
- Some shared metadata structures, especially top level categories and data-provider hierarchy management, may still be handled by metadata curators rather than by normal editors.
- Metadata Preview can lag slightly behind your latest save, especially on big environments with a lot of entities.
- Category scheme management is typically an admin-only task and is out of scope for this guide.
If you are unsure whether a change is safe to make yourself, contact the metadata curators or Backoffice admins for your deployment before editing the shared structure directly.
Common mistakes
- Logging into the Platform preview with a different email than the one used in the Backoffice
- Starting from the Data Product list when what you actually remember is the service title shown on the Platform
- Forgetting to save before switching section
- Trying to edit a published record directly instead of creating a new draft first
- Expecting a submitted draft to become public before it has been reviewed
- Thinking you must submit a draft before you can preview it on the Platform
- Adding a parameter before its name appears in the URI template
- Assuming you can create more than one draft per asset with the same account
Need the technical details?
Use this guide for the day-to-day editing workflow, then switch to the technical pages when you need deeper background:
- Backoffice Service for lifecycle, permissions, and service behavior
- Data Model for entity relationships
- EPOS-DCAT-AP for the metadata standard behind the interface
- Converter Plugins for the plugin model used by plugin requests